
The shift from mono to stereo was revolutionary. The shift from stereo to 3D is a seismic event. Major streaming services are prioritizing Spatial Audio Mixing, making immersive sound the new standard for premium listening. For independent producers, this creates an enormous opportunity to stand out.
Are you still stuck in the flat, two-dimensional world of stereo? The future of music is immersive, yet the high cost and complexity of a full 7.1.4 setup is a major barrier for many artists. This guide simplifies Spatial Audio Mixing and provides the roadmap to master the Dolby Atmos for music workflow without requiring a major studio build. We will reveal the 7 essential secrets to create breathtaking immersive audio that instantly grabs listeners on platforms like Apple Music and Tidal.
Stereo vs Spatial Audio: The Fundamental Shift for Producers
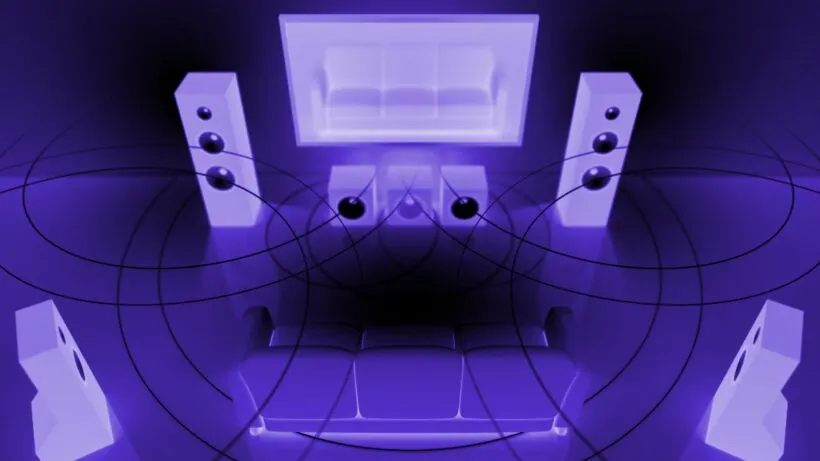
Before you start panning, you must change your mixing mindset. Stereo is flat—a canvas in front of you. Spatial audio is a dome around you.
Understanding Channel-Based vs. Object-Based Audio
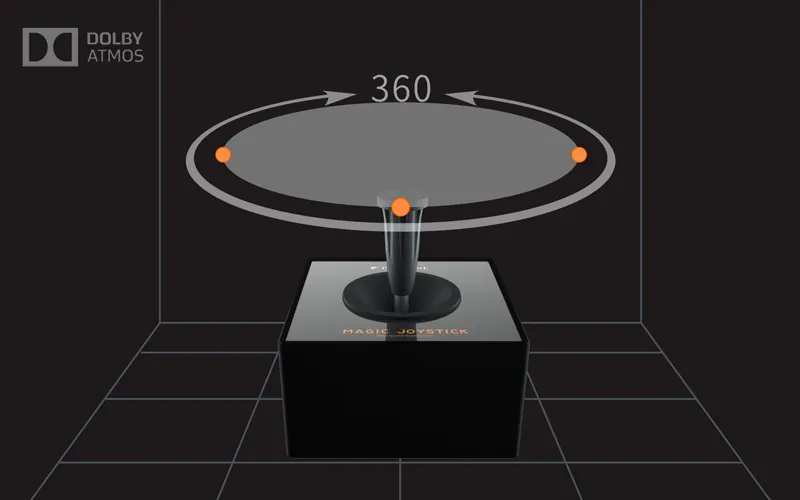
Traditional stereo and even surround sound (like 5.1) are channel-based. Tracks are routed to fixed speaker channels (Left, Right, Center, etc.). Spatial Audio Mixing, particularly Dolby Atmos, uses object-based audio. Each sound element (e.g., a synth line, a backing vocal) is treated as an independent object with metadata describing its 3D coordinates (X, Y, Z). The playback system then decides which speakers to use to accurately position that object relative to the listener.
The Power of Height and Depth (The Z-Axis)
The most significant difference is the Z-axis—the vertical plane. In a traditional stereo mix, everything is on a single horizontal line. With spatial audio, you can place elements above and below the listener, adding tremendous depth and separation. This allows you to give every instrument its own air, solving the age-old problem of mix clutter.
The Downmix Problem: Maintaining Clarity in Stereo
A critical aspect of the immersive audio workflow is ensuring the mix translates perfectly when downmixed to standard stereo or binaural headphones. If you place a vital element too high or too far back, it might disappear or lose impact in the stereo version. The key is to treat the stereo version as a required quality check and not as an afterthought.
Your Home Studio Gear: Budget-Friendly Dolby Atmos for Music Setup
You do not need a million-dollar studio to start. The modern Dolby Atmos for music workflow is surprisingly accessible.
The Minimum Requirement: Headphones with Binaural Rendering
The simplest, cheapest entry point is headphones. The Dolby Atmos Renderer software can create a highly accurate binaural downmix in real time. This binaural rendering simulates the 7.1.4 speaker array using psychoacoustic processing (HRTFs) tailored for headphones. While it’s not a perfect replacement for speakers, it’s the primary way most consumers listen, making it the most important check for independent producers.
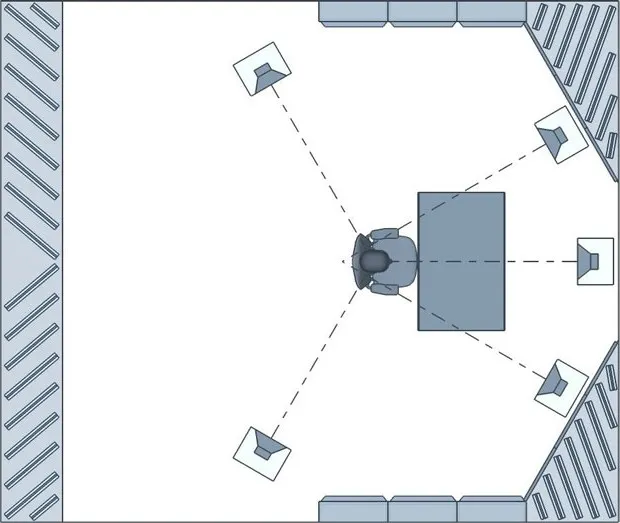
Entry-Level 5.1.2 vs. Industry Standard 7.1.4 Setup
The industry standard is 7.1.4 (7 horizontal speakers, 1 LFE/sub, 4 height speakers). For a home producer, a 5.1.2 (5 horizontal, 1 LFE, 2 height) or even a simple 5.1.4 setup is often more realistic. The most important factor, regardless of size, is proper calibration and time alignment to ensure accurate object positioning.
Essential Software: DAW Integration and the Dolby Atmos Renderer
You need three things:
- A Compatible DAW: Currently, Logic Pro, Pro Tools Studio/Ultimate, and Nuendo offer native Dolby Atmos Renderer integration.
- The Renderer: This software (or built-in feature) takes your DAW tracks, reads the object metadata, and outputs the sound to your monitoring system (speakers or headphones). You can get the official Dolby Atmos Renderer trial to start practicing immediately.
- An Audio Interface: You will need an interface with at least 10 outputs (for a 5.1.4 setup) to feed all your speakers separately.
Mastering the Immersive Audio Workflow: Preparation is Key
The transition to an Immersive Audio Workflow requires meticulous preparation to save time and prevent technical errors.
Pre-Mixing for Spatialization: Stem Separation and Organization
Start by simplifying your mix. Get your stereo mix as close to perfect as possible first. The goal is to maximize separation. If your drum bus is compressed together, you lose the ability to move the hi-hats overhead. For maximum control, ensure your stems are completely separated (kick, snare, cymbals, lead vocal, backing vocals, etc.). Proper session organization is essential.
The Bed vs. Objects Strategy
In Dolby Atmos, every track is either routed to a “Bed” or assigned as an “Object.”
- The Bed: A fixed channel-based container (typically 7.1.2) for stable, anchoring elements (main drum rhythm, bassline, lead vocal).
- Objects: Discrete channels that can be panned anywhere in the 3D space (ear candy, effects, backing vocal swirls).
The Bed ensures playback consistency, while Objects provide the 3D flair.
Setting the Loudness Standard (-18 LUFS)
Unlike the loudness wars of stereo mixing, Spatial Audio Mixing has strict loudness requirements. The target loudness for most platforms is -18 LUFS (Integrated), with a True Peak of no more than -1 dBTP. This dynamic range allows devices to adapt the playback properly. Adhering to the recommended loudness standard for immersive audio is non-negotiable.
Secret 1: The Art of Object Placement and Movement
The 3D panner is your new favorite tool, but subtle, purposeful movement is always more effective than frantic swirling.
Using the 3D Panner for Front-to-Back Depth
Use the Z-axis (front-to-back depth) to create distance. Placing an instrument close to the front of the dome creates intimacy and impact, while placing it at the back (or above) adds space and atmosphere.
Automating Movement
A completely static sound in a 3D field can feel unnatural. Even small, slow automated movement (such as a synth pad gliding slightly) brings the track to life. Avoid automating too many objects at once to maintain focus.
Avoiding the Center Trap
Do not place objects dead center; this collapses the binaural rendering. Place them slightly off-center to encourage spatialization.
Secret 2: Taming Reverb and Delay in 3D Space
Traditional stereo reverbs can easily ruin a spatial mix.
Why Traditional Reverbs Fail
Stereo reverbs are 2D effects in a 3D room, leading to spatial conflicts. Use immersive reverbs built into Atmos, or place the reverb return itself as an Object (like an echo bouncing off the ceiling).
Using Binaural Rendering Plugins
Headphones are critical. Use a binaural rendering plugin to check your headphone mix and ensure translation accuracy, especially for the low end.
Splitting Frequencies for Directional Low End
Low-end (below 100 Hz) is non-directional. Keep sub-bass in the Bed, but pan the mid-range harmonics for movement.
Secret 3: Quality Control & The Critical Downmix Check
The hallmark of a truly professional spatial audio mixing workflow is achieving flawless downmix compatibility. A mix that sounds incredible in 3D must also retain its clarity, balance, and emotional impact when folded down to stereo or played through standard headphones. This stage is often underestimated, yet it’s one of the most important steps in mastering spatial audio mixing for real-world playback.
A/B Referencing for Translation Accuracy
To maintain consistency, you should constantly A/B your spatial audio mix against the original stereo master. This allows you to ensure that your immersive sound design doesn’t lose the song’s core energy or emotional tone. The goal of spatial audio mixing isn’t to replace stereo—it’s to enhance it by expanding the listener’s experience. When switching between your stereo and spatial versions, the vocal presence, groove, and tonal balance should feel identical in intent, even if the space and depth are more pronounced. Always listen critically on multiple playback systems—professional monitors, studio headphones, and even consumer earbuds—to confirm that your spatial mix translates across formats.
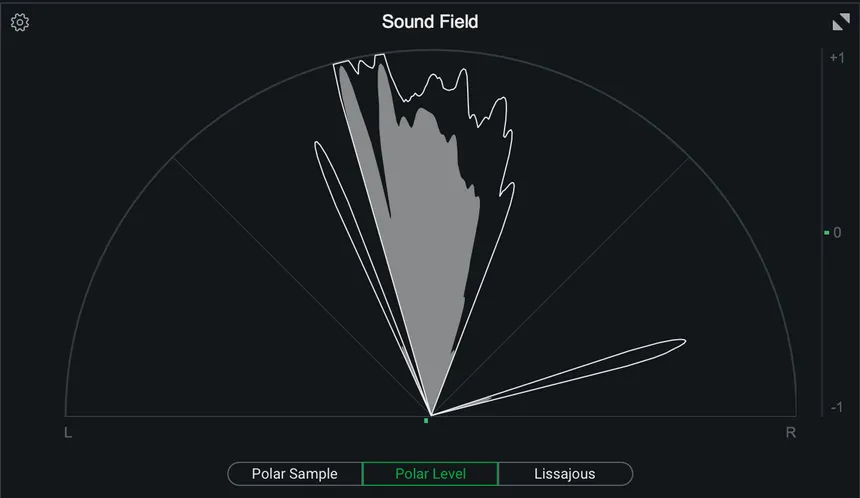
The Binaural Check and Phase Control
Headphone playback is the most common way listeners experience spatial audio mixing, so the binaural check is vital. Use this test to examine bass response, stereo width, and center clarity. Pay close attention to potential phase issues—especially in the low-end—caused by excessive object movement or improper panning automation. Remember that what sounds impressive in a fully immersive room can become hollow or unstable in stereo. To master spatial audio mixing, always fine-tune your binaural render so that every instrument maintains its integrity without phase conflicts or localization errors.
The best engineers treat downmix verification as an art form. By combining technical precision with creative listening, you ensure your spatial audio mixing projects maintain the same emotional power and sonic impact across every platform—from Apple Music’s Spatial Audio to standard two-channel playback. This meticulous approach separates amateur spatial mixes from professional immersive productions.
Secret 4: Creative Applications: Instrument Strategies
Spatial audio mixing isn’t just about technical setup—it’s an opportunity for artistic storytelling. Creative use of 3D space can completely transform how instruments interact and how listeners experience your music. The key is balance: use 3D placement to enhance, not distract from, the emotion of the song.
Vocals
Keep the lead vocal anchored in the center or slightly forward to maintain intimacy, while supporting vocals and harmonies can occupy the height and surround fields. This spatial layering technique makes your spatial audio mixing feel immersive without losing lyrical clarity.
Drums
In spatial audio mixing, stability in the rhythm section is essential. Keep your kick, snare, and bass elements grounded in the bed channels for punch and cohesion. Then, experiment by positioning cymbals, hi-hats, and percussion in the height channels to create a sense of air and energy. This separation enhances rhythm dynamics and makes the mix feel wider and more alive.
Synths and Pads
Pads and ambient textures shine in spatial audio mixing. Place them in the rear or upper channels, automate gentle movements, and allow them to breathe through the 3D sound field. Subtle panning or movement across the dome adds dimension without overwhelming the core mix. Done well, this technique creates the feeling that the listener is sitting inside the song rather than merely hearing it.
Mastering these creative strategies transforms your spatial audio mixing sessions into immersive storytelling experiences that engage listeners on an emotional and spatial level.
Secret 5: Distribution and Monetization for Independent Producers
Once your spatial audio mixing project is complete, the next step is delivering it professionally for release. Every major streaming platform—such as Apple Music, Tidal, and Amazon Music—supports Dolby Atmos and other immersive formats. To distribute your work correctly, you’ll need to export your final ADM BWF file (the Atmos master), which contains all your audio objects and 3D metadata. This file is what your distributor will submit to platforms that support spatial audio mixing delivery.
Before uploading, double-check each platform’s metadata requirements, naming conventions, and loudness standards. Incorrect or incomplete metadata can cause your mix to be rejected or misrepresented in playback. Many distributors now offer dedicated support for immersive formats, so it’s worth choosing one that explicitly lists Dolby Atmos music or spatial audio mixing compatibility.
Beyond the technical details, spatial audio mixing can significantly boost your visibility as an independent artist or producer. Streaming platforms are actively promoting immersive audio releases, featuring them in curated playlists and “Spatial Audio” collections. By releasing your tracks in this format, you not only elevate your sonic quality but also position yourself for greater discoverability, playlist placement, and long-term catalog value. Investing in spatial audio mixing today means building a portfolio that will remain future-proof as immersive playback becomes the industry norm.
Secret 6: Top 5 Critical Mistakes Beginners Make
Even experienced producers can struggle when transitioning to spatial audio mixing. Avoiding these common pitfalls can save hours of frustration and keep your mixes sounding balanced and professional.
- Overusing the LFE Channel
The Low-Frequency Effects (LFE) channel was designed for cinematic explosions, not for music. In spatial audio mixing, the sub-bass should remain within the full-range speakers of your bed channels. Overloading the LFE can distort your low end and cause translation issues when the mix is downmixed to stereo. - Ignoring Time Alignment and Calibration
Precise speaker calibration is the backbone of spatial audio mixing. Even a few milliseconds of misalignment between speakers can destroy the 3D illusion and shift your sound objects out of place. Always measure distances, check phase coherence, and use the Dolby Atmos calibration tools before mixing. - Automating Too Much Movement
Movement in spatial audio mixing is powerful—but overdoing it leads to listener fatigue. Keep automation purposeful. Subtle, slow transitions are far more engaging than constant panning that distracts from the music. - Neglecting the Center Channel
The center channel plays a critical role in maintaining vocal clarity and focus. Ignoring it can make your mix feel hollow or unanchored. In spatial audio mixing, a stable center ensures your lead vocals and primary instruments remain consistent across playback systems. - Failing to Use the Full 3D Field
Many beginners only pan left, right, and back, ignoring the height dimension. The Z-axis is what separates spatial audio mixing from traditional stereo. Use it to lift background vocals, effects, or ambient sounds above the listener for an enveloping, cinematic effect.
Avoiding these mistakes will not only enhance the clarity and power of your immersive productions but also help your mixes translate seamlessly across any playback environment.
Secret 7: The Future of Spatial Audio Mixing (2025 Trends)
The future of spatial audio mixing is rapidly evolving, with new technologies reshaping how artists produce and listeners experience music. What was once considered futuristic is now becoming a mainstream expectation across all major streaming ecosystems.
Personalized HRTFs and Listener-Specific Experiences
Head-Related Transfer Functions (HRTFs) are at the heart of how humans perceive 3D sound. As research advances, we’re moving toward personalized HRTFs—tailored to the unique shape of each listener’s head and ears. This means spatial audio mixing will soon deliver perfectly optimized playback for every individual, making the immersive experience more realistic than ever before.
AI-Assisted Object-Based Mixing Automation
Artificial intelligence is transforming spatial audio mixing workflows. Modern tools can now analyze stereo mixes and automatically generate initial 3D object placements. These AI-assisted systems don’t replace creativity but instead provide a strong foundation for engineers to refine and customize. Expect DAWs and renderers to integrate smarter automation tools that accelerate production without sacrificing precision.
Consumer Devices with Built-In 3D Virtualization
Hardware manufacturers are also playing a crucial role in the growth of spatial audio mixing. From soundbars and smart speakers to headphones and even laptops, more devices are integrating real-time 3D virtualization technology. This allows listeners to enjoy immersive soundscapes without needing expensive multi-speaker setups. As accessibility grows, so will the demand for professionally mixed immersive audio content—opening new revenue streams for independent producers and mix engineers.
The takeaway is clear: spatial audio mixing isn’t just a passing trend—it’s the future of how music will be created, distributed, and experienced. Those who master it now will be leading the next wave of innovation in modern music production.
Conclusion
Mastering Spatial Audio Mixing is an investment in your creative future. By embracing object-based mixing and following these seven secrets—from setup to quality control—you can produce immersive, professional-grade mixes that transcend stereo. The immersive revolution is here; independent producers can now lead it.
FAQ Section
1. Is a full speaker array necessary to mix in Dolby Atmos for music?
No. While a full $7.1.4$ or $5.1.4$ system is ideal for accurate monitoring, you can begin the immersive audio workflow using high-quality studio headphones and the Dolby Atmos Renderer‘s built-in binaural rendering capabilities.
2. What is the recommended loudness standard for Spatial Audio Mixing?
The industry standard recommended by Dolby and UMG is -18 LUFS (Integrated) with a True Peak maximum of $-1$ dBTP. This ensures the mix has enough dynamic range to translate properly across different playback systems.
3. How do I deliver my Dolby Atmos Renderer file to distributors?
You deliver a single file known as the ADM BWF (Audio Definition Model Broadcast Wave Format) file. This file contains all audio and the spatial metadata. You must upload this file through a distributor that supports Dolby Atmos delivery to streaming services like Apple Music and Tidal.
4. What is the biggest difference between Stereo vs Spatial Audio?
The biggest difference is the dimension of height (the Z-axis). Stereo is confined to two channels (Left/Right) on a flat plane. Spatial audio, using object-based audio, allows sounds to be positioned and moved anywhere in a $3$D sphere around the listener.
5. Can I use my existing $7.1.4$ setup for music, or is it just for film?
Yes, you can. The $7.1.4$ setup is the standard reference for both film and Dolby Atmos for music. The core difference in music mixing is the strategy: music typically uses the LFE channel less and focuses more on the creative movement and placement of individual instrument object-based audio.
6. How much does the Immersive Audio Workflow actually cost for a beginner?
The cost can range from nearly free (using Logic Pro’s built-in Dolby Atmos Renderer and existing headphones) to several hundred dollars (for the Renderer subscription and a quality multi-output audio interface) to thousands (for a full $5.1.2$ or 7.1.4 setup).
7. What is Object-based Audio and how does it affect my mix?
Object-based audio treats each sound (e.g., a snare hit, a synth swell) as a discrete “object” that is placed in 3D coordinates. It affects your mix by giving you the ability to move and position instruments with precision, providing far greater clarity and separation than simple panning in stereo.
8. Does Binaural Rendering sound exactly the same as a speaker mix?
No. While binaural rendering provides an excellent simulation of the $3$D mix for headphones, it can never perfectly replicate the acoustic interaction of a real room and physical speakers. Always use the binaural mix as a critical check, not the final master reference.