
If you’re a music producer, you know the cycle: a spark of inspiration, a killer 4-bar loop, endless tweaking, and then—the project file that sits forever in the “Unfinished” folder you neve Finish Music Production. The truth is, finishing a track is a completely different skill set than starting one. It requires discipline, perspective, and a specific workflow designed to break through creative inertia.
This ultimate guide unveils the 5 explosive steps used by pro engineers and chart-topping producers to transition from an idea to a releasable master. By adopting this streamlined process, you will finally Finish Music Production and stop leaving your best work on the digital cutting room floor.
Step 1: The Revolutionary Mindset Shift to Finish Music Production
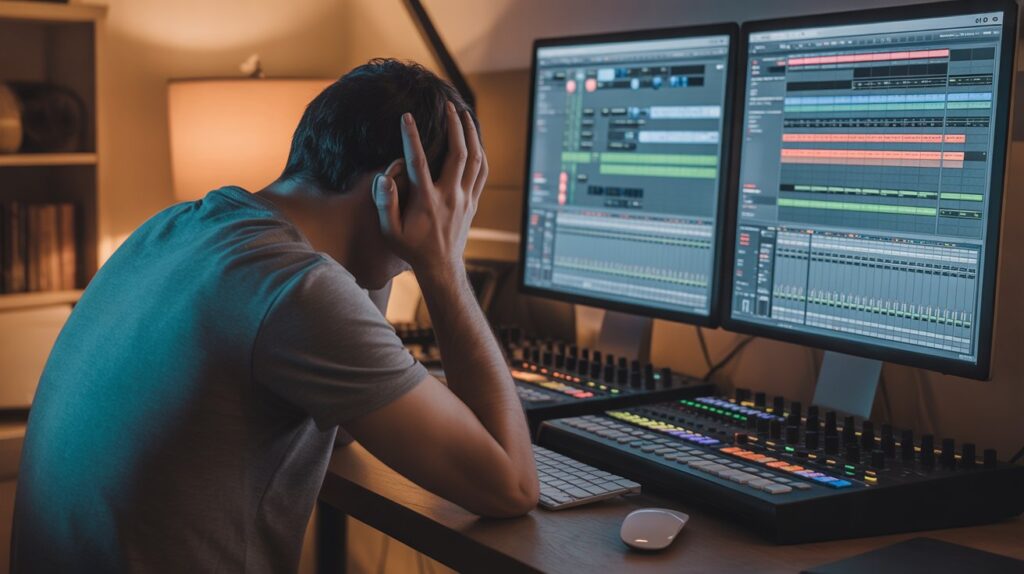
The biggest block to completing music isn’t technical; it’s psychological. You need to change your brain from “creator” mode (exploring, experimenting) to “architect” mode (committing, structuring).
The 80/20 Rule of Idea vs. Execution (to Finish Music Production)
Accept that 80% of your time should be spent on execution (arrangement, mixing, mastering), and only 20% on creation (sound design and initial loops). Once a loop is solid, your job is not to make it “better,” but to make it complete.
Set a Hard Deadline for the Loop Stage (to Finish Music Production)
Give yourself one or two sessions, maximum, to generate the core ideas. Once that time is up, COMMIT. If you are stuck, try using the 2-minute rule for overcoming procrastination—if you can start the next step (like arranging) in under two minutes, do it immediately.
Separate Creation from Mixing
Never, under any circumstances, mix while you create. Mixing is a technical process that pulls you out of the emotional flow of creation. Dedicate separate sessions for each. This separation is the foundation of a successful attempt to Finish Music Production.
Step 2: Mastering Arrangement Techniques (The 8-Minute Myth)
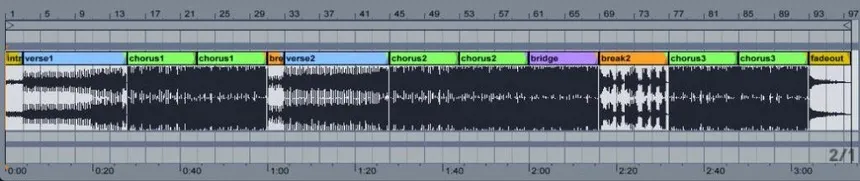
The “loopitis” problem stems from a failure to transition the core idea into a dynamic journey. Your arrangement must tell a story before Finish Music Production.
Map the Song Structure First (to Finish Music Production)
Don’t free-flow. Create markers in your DAW for every section before filling in the audio. A typical structure looks like: Intro (16 bars) -> Verse 1 (16 bars) -> Chorus (8 bars) -> Verse 2 (16 bars) -> Chorus (8 bars) -> Bridge/Breakdown (16 bars) -> Chorus (16 bars) -> Outro.
The Power of Subtraction and Variation (to Finish Music Production)
The secret to a great arrangement is not adding more sounds, but varying the existing ones. Use filtering, muting, and subtle automation to create movement between sections. Don’t add a new synth; drop the drums out for a bar. Focus on making the chorus feel big by making the verse feel small. To create musical complexity that drives an arrangement forward, review your composition guide for music theory.
Be Genre Aware, Not Genre Bound
While most modern music tracks are shorter than they used to be—check out the average song length trends across modern genres—don’t constrain your creative length just for radio. However to Finish Music Production , a well-defined structure prevents tracks from meandering. If you struggle to expand your ideas, use elevate your production workflow with MIDI kits to quickly generate chord progressions and melodies that bridge sections.
Step 3: The Brutal Edit: Pruning Your Tracks for Maximum Impact
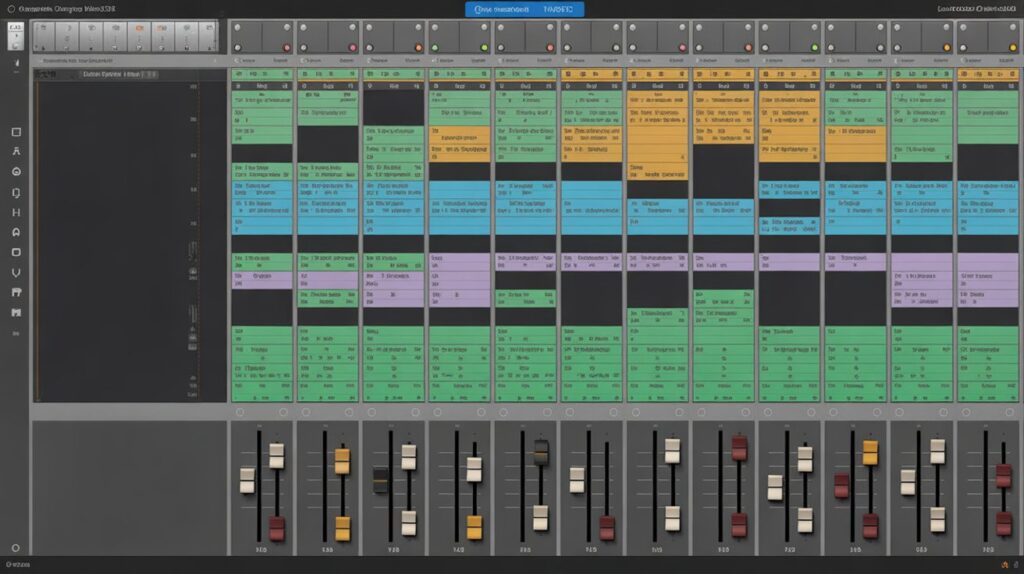
Before you mix, you must clean house. A cluttered, complex project is impossible to mix well and is the number one momentum killer. This is the brutal stage where you separate the essential from the ornamental.
Mute and Delete the Unnecessary
To Finish Music Production, If a track doesn’t add to the emotional core, the groove, or the main melody, delete it. Be ruthless. Mute all effect sends and bus processing to hear the dry tracks clearly. You should aim to reduce your track count by at least 10%.
Consolidate and Time-Align Everything
Commit to your decisions to Finish Music Production. Consolidate every heavily edited track (e.g., vocals, ad-libs, sound design) into a single audio file. This simplifies your project, reduces CPU strain, and makes it feel more “finished.” Ensure all drum hits are tightly time-aligned with the grid to maximize punch and cohesion.
Fix All Timing and Tuning Issues Now
If a vocal is out of tune, or a bassline is slightly off-grid, fix it before mixing. Mixing cannot fix foundational errors. The time you spend correcting now will save you hours of frustrated tweaking later, moving you closer to successfully completing your Finish Music Production goal.
Step 4: The Mixdown Bridge: Objective Mixing for Finish Music Production
Mixing is the bridge between the creative phase and the final master. It must be an objective, technical process where your ears are used for analysis, not creation. This is the most crucial step for a polished Finish Music Production result.
The Headroom Rule
Set your master fader to -6 dBFS and ensure your loudest peak does not exceed this level. This provides essential headroom for the mastering engineer (or your mastering plugin) to work cleanly.
The Power of Reference Tracks
A/B your mix against a commercial track in the same genre. This is not optional—it is required. Use the reference track to compare the frequency balance (is my low-end too loud?), stereo width, and overall loudness. Reference checking provides the principles of objective critical listening in audio engineering.
Use Advanced Techniques for Clarity
To ensure your kick and bass don’t clash, master advanced sidechain compression techniques. This creates rhythmic space, a hallmark of professional-sounding tracks in genres like Dancehall, Trap, and Afrobeat.
Get Distance and Perspective
Never mix for more than 4 hours in a day, and always take a 15-minute break every hour. Your ears fatigue quickly. The best secret is the 24-Hour Listening Test: export the final mix and listen to it on fresh speakers, a car stereo, or headphones 24 hours later. The flaws will jump out immediately.
Step 5: Finalizing the Master: Your Non-Negotiable Finishing Checklist
The mastering stage is the final quality control and level-setting process. Its job is to prepare your track for distribution and ensure competitive loudness—nothing more.
The Mastering Chain (Keep it Simple)
A simple mastering chain is often best:
- Subtle EQ: A gentle corrective EQ if needed (e.g., taming harsh high-mids).
- Multiband Compressor (Optional): Used sparingly to balance the overall frequency spectrum.
- Limiter: The final, indispensable tool. Set the ceiling to -1.0 dBTP (True Peak) to prevent distortion on streaming services.
The LUFS Target
For all major streaming platforms (Spotify, Apple Music, etc.), the integrated loudness target is around -14 LUFS. Pushing the mix much louder is a waste of dynamic range, as the service will simply turn it down. Check your final levels against the mastering requirements using ultimate workflow guide using AI music production tools for quick analysis.
Final File Checklist
Before hitting “Export,” verify these non-negotiables:
- True Peak: Under -1.0 dBTP.
- Integrated Loudness: Between -13 and -15 LUFS.
- Format: 24-bit (or 32-bit float) WAV/AIFF at the session’s native sample rate.
- Silence: Remove any stray audio or silence at the beginning or end of the track.
Unlocking Hyper-Productivity: Advanced Workflow Hacks for Producers
To speed up your transition from loop to master, integrate these habits into your daily music production workflow.
- Template Everything: Save templates for every genre you produce (Trap, Afrobeat, Dancehall). Include your standard routing, go-to bus compressors, and master bus chain. Starting with 80% of your work done is a massive productivity boost.
- The Pomodoro Technique: Work in hyper-focused 25-minute sprints followed by 5-minute breaks. This keeps your mind sharp and prevents the energy slump that leads to procrastination.
- Chase the Flow State: Structure your environment to minimize distractions. When you are in a how to achieve a state of flow while producing music, you lose track of time and produce your best work.
Avoid Producer Burnout: Sustainable Habits to Finish Music Production
Trying to force a track to completion when your creative energy is drained is a recipe for disaster. Sustainable production is key to consistently achieving your goal to Finish Music Production.
Commit to the “Good Enough” Rule
Perfection is the enemy of done. Ninety-nine percent of listeners will never notice the tiny flaws you obsess over. Once you’ve completed your Mixdown Bridge (Step 4) and 24-Hour Listening Test, declare the track done.
Prioritize Physical and Mental Health
Burnout is real. If you feel dread when opening a project, you may need to review signs of creative burnout and recovery strategies. Take a week-long break, work on a completely new genre, or switch your focus entirely to sound design. To manage the mental demands of the creative process, explore ADHD music production workflow hacks for structured approaches.

Conclusion
The path to completing music is linear, not circular. The five steps—Mindset, Arrangement, Edit, Mixdown, and Master—provide a map to navigate the difficult terrain between inspiration and release. By applying these explosive secrets, you will not only Finish Music Production but you will find yourself completing tracks faster, with higher quality, and with less anxiety. Choose a project from your “Unfinished” folder, apply Step 1, and commit to the process today.
Frequently Asked Questions (FAQ)
Q: Why do I always get stuck in the 4-bar loop?
You are stuck because you are mixing creativity (exploring new ideas) with analysis (tweaking sounds). To break the loop, you must commit to a structure (Step 2) and force yourself to move from creation to arrangement. Using pre-made chord progressions from MIDI kits can also instantly help bridge the gap.
Q: How much louder should my master be than my mix?
The mastering stage should only increase the perceived loudness and competitive level. If your mix is at -6 dBFS (Step 4), your limiter should typically only be achieving 3-6 dB of gain reduction to reach the -14 LUFS target. If you need more than 6 dB of limiting, your mix needs to be revisited.
Q: How can I tell if my mix is really “finished”?
The only way to objectively know is through referencing and testing. Your mix is finished when it closely matches your commercial reference tracks in frequency balance, stereo width, and dynamics, and when you can listen to it on multiple systems (car, phone, studio monitors) without finding any critical flaws.
Q: What is the biggest mistake producers make when they try to Finish Music Production?
The biggest mistake is a lack of commitment and a fear of finality. Many producers continue to “tweak” indefinitely out of fear that the track is not perfect. Perfectionism is the #1 enemy of completed tracks. Follow the 5-step process and commit to releasing your work.
Q: What is a good time frame to complete a professional track?
While this varies, a focused producer working part-time should aim to complete the arrangement and basic mix within 1-2 weeks. The final mixdown (Step 4) can take 2-4 sessions, and mastering (Step 5) should take less than 1 session. A typical professional track can go from loop to final master in about 2-4 weeks of focused effort.