
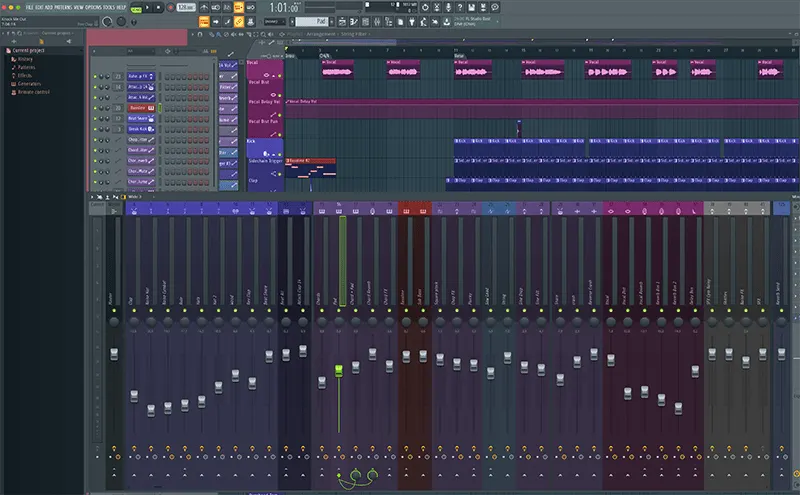
You just opened FL Studio for the first time. The screen stares back at you empty, overwhelming, and completely silent. You click around, open some menus, close them. Five minutes pass. Ten minutes. You close the laptop. Another day, zero progress.
This is the reality for thousands of aspiring producers. They have the software, the desire, and the passion. What they don’t have is a roadmap.
This FL Studio tutorial is that roadmap. Not a 3-hour masterclass. Not advanced sound design theory. Just seven proven steps that will take you from a blank screen to a finished, listenable beat in 30 minutes. No prior experience required. No expensive plugins needed. Just FL Studio, 30 minutes, and the willingness to finish something.
If you’re serious about starting your journey as a bedroom producer, the only thing standing between you and your first finished beat is this guide.
Why Most Beginners Never Finish Beats (And How This FL Studio Tutorial Fixes It)
The music production world has a dirty secret: 90% of people who buy FL Studio never finish a single track. They open the software, get overwhelmed, and quit before creating anything meaningful.
Research on creative paralysis and decision fatigue shows that when humans face too many choices, they default to doing nothing. FL Studio presents thousands of choices—sounds, plugins, settings, routing options. For a beginner, this is paralyzing.
The Paradox of Choice in Modern DAWs
Twenty years ago, producers had limited gear. A drum machine, a sampler, maybe a synthesizer. Limitations forced creativity. Today, FL Studio gives you unlimited tracks, thousands of samples, and more plugins than you’ll ever use. This sounds like freedom, but it’s actually a trap.
When everything is possible, nothing gets done.
Perfectionism vs. Completion
Beginners fall into the perfectionism trap immediately. They spend two hours tuning a kick drum that will be buried in the mix anyway. They watch 47 YouTube tutorials before touching the software. They’re so afraid of making something “bad” that they make nothing at all.
How Time Constraints Force Creativity
This FL Studio tutorial uses a 30-minute constraint for a specific reason: deadlines force decisions. When you only have 30 minutes, you can’t agonize over snare sounds. You grab one that works and move forward. You finish something. And finishing something—anything—is the single most important milestone for a beginner.
FL Studio Tutorial: Essential Setup Before You Start
Before the clock starts, you need a basic setup. This isn’t about perfection—it’s about removing friction so you can move fast.
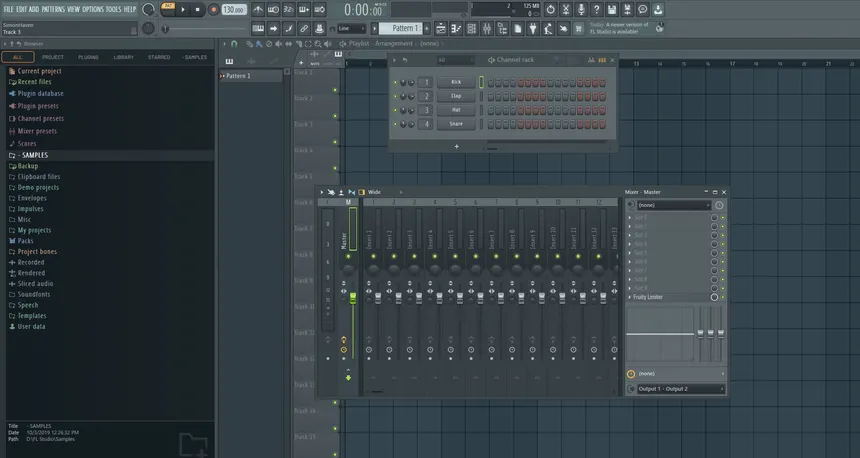
FL Studio Tutorial: Template for Speed
Open FL Studio right now. Go to File > New from template > Minimal. This gives you a basic mixer, one pattern, and zero clutter. If you want to get even faster, create a blank template with just one instance of FPC (Fruity Drum Pattern) loaded and one instance of FL Keys. Save it as “30 Minute Template.”
According to the official FL Studio documentation on project settings, templates can save hours of setup time over multiple projects.
FL Studio Tutorial: Stock Plugins vs. Third-Party
Here’s the truth that plugin companies don’t want you to know: FL Studio’s stock plugins are incredible. FPC, FL Keys, Sytrus, Harmless—these are professional-grade tools used in countless hit records.
You do not need Nexus. You do not need Omnisphere. You do not need Serum. Not for your first beat, not for your tenth, and probably not for your hundredth.
FL Studio Tutorial: MIDI Controller
If you have a MIDI keyboard, plug it in and go to Options > MIDI Settings. Make sure it’s enabled. If you don’t have one, don’t worry—the piano roll is actually faster for precise programming.
FL Studio Tutorial: Organizing Your Browser
Open the Browser panel (left side). Navigate to Packs > Drums > Kick. Right-click and select “Add to bookmark.” Do the same for Snares, Hi-Hats, and Melodic samples. Now your most-used sounds are one click away.
FL Studio Tutorial: Lock in Your Tempo and Key (The Foundation)
Your 30 minutes start now.
FL Studio Tutorial: The Right BPM for Your Genre
Look at the top toolbar. You’ll see “140” in a box. That’s your tempo (BPM). Click and drag up or down to change it.
- Hip-Hop/Trap: 140-160 BPM (half-time feel = 70-80 BPM)
- Lo-Fi: 70-90 BPM
- House/Techno: 120-130 BPM
- Drill/UK Rap: 140-150 BPM
For your first beat, pick 140 BPM. It works for everything and forces nothing.
Setting Your Project Key for Melodic Cohesion
FL Studio doesn’t force you to set a key, but you should pick one mentally. For beginners, stick to A Minor or C Major. These keys use only white notes on the piano roll—no sharps, no flats, no wrong notes.
Why 90% of Beats Use These 4 Keys
A Minor, C Major, E Minor, and F Minor account for the vast majority of popular music. They sit in the sweet spot of the human voice and feel natural to our ears. Pick one and commit.
FL Studio Tutorial: Build Your Drum Pattern (The Groove)
Drums are the backbone. Get these right, and your beat will groove even before the melody arrives.
Selecting Kick, Snare, and Hi-Hats from Stock Samples
In the Browser, go to your bookmarked folders. Pick:
- One kick drum (deep, punchy)
- One snare or clap (crisp, present)
- One closed hi-hat (short, tight)
- One open hi-hat (optional, for variation)
Drag each into the Step Sequencer (the grid window at the bottom).
Programming Basic Patterns in the Step Sequencer
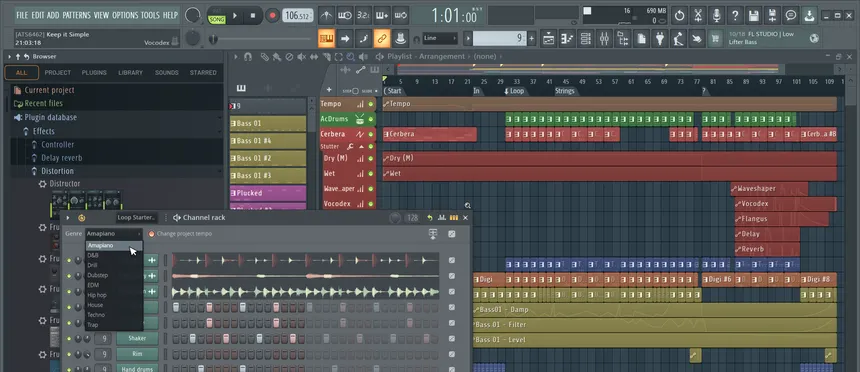
The Step Sequencer has 16 steps per pattern. Click the squares to activate sounds:
- Kick: Steps 1, 5, 9, 13 (the downbeats)
- Snare: Steps 5 and 13 (the backbeat)
- Hi-Hat: Every other step (1,3,5,7,9,11,13,15)
Click play. You just made a beat. Congratulations.
Adding Swing and Humanization
Click the little arrow at the top-left of the Step Sequencer. Select “Swing” and set it to 25%. This shifts the timing slightly, making the pattern feel looser and more human.
For extra realism, hold ALT and drag the velocity of individual hi-hats up and down randomly. Real drummers don’t hit every note with the same force.
Creating Variation with Ghost Notes
Ghost notes are quiet snare hits between the main snare hits. Add a few at steps 7 and 11, but turn their velocity down to 20-30%. This adds depth without overpowering.
If you want to expand your drum sound library later, check out our collection of professional drum kits for trap production to take your beats to the next level.
FL Studio Tutorial: Create a Simple Melody (The Hook)
Most beginners overthink melodies. They try to write complex symphonies and end up with nothing. The secret is simplicity.
Using the Piano Roll for the First Time
Click on a pattern in the Step Sequencer (like the kick pattern). Press F7. This opens the Piano Roll. Right-click anywhere to draw notes. Left-click and drag to move them.
The “3-Note Rule” for Instant Melodies
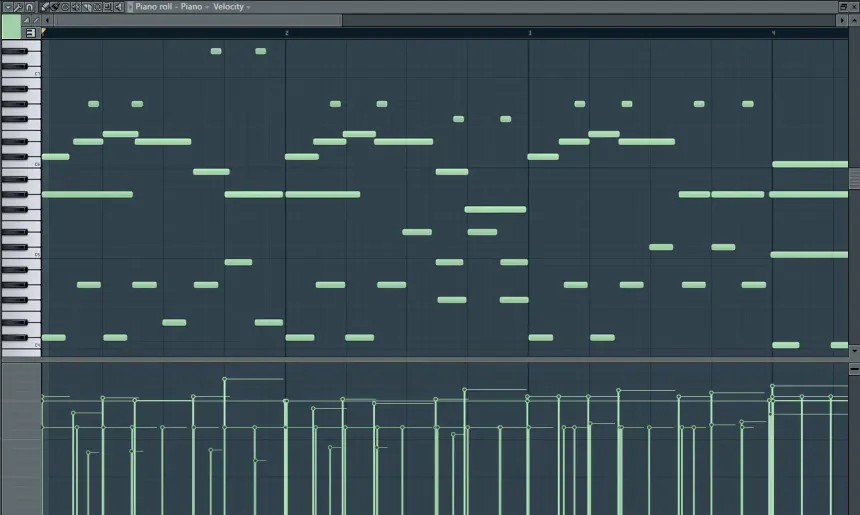
Pick three notes from the A Minor scale (A, C, D, E, F, G). Arrange them like this:
- Note 1: Hold for 2 beats
- Note 2: Hold for 1 beat
- Note 3: Hold for 1 beat
- Repeat
That’s it. Three notes. You now have a melody. For more melodic inspiration, consider using pre-made MIDI patterns to speed up your workflow—they’re perfect for learning how professionals structure their melodies.
Adding Chords with the Stamp Tool
In the Piano Roll, look for the little paintbrush icon (Stamp Tool). Click it, then select “Chord” from the dropdown. Click on C4, and FL Studio will draw a full C Major chord for you.
Add chords under your melody for instant depth. Play the chords on the offbeats (steps 2,4,6,8) to keep the rhythm interesting.
Layering Sounds for Thickness
Duplicate your melody pattern (right-click > Clone). Load a different sound—maybe FL Keys for piano and Harmless for synth. Now two instruments play the same melody, creating thickness and interest.
FL Studio Tutorial: Add Bass That Knocks (The Foundation)
Bass is what translates through club speakers and car stereos. Get this right, and your beat will physically move people.
Sub Bass vs. Mid Bass
FL Studio has two main bass tools: BooBass (simple electric bass sound) and 3xOSC (customizable synth bass). For your first beat, use BooBass. It’s simple, it sounds good, and it requires zero programming knowledge.
Following Your Kick Pattern
The golden rule of bass programming: when the kick hits, the bass should NOT hit. This creates space and prevents mud.
Program your bass to play on the offbeats:
- Kick on 1 → Bass on the “and” of 1
- Kick on 3 → Bass on the “and” of 3
In Step Sequencer terms, if your kick is on steps 1,5,9,13, put your bass on steps 3,7,11,15.
Sidechain Basics (Even Without Compression)
Sidechain compression makes the bass “duck” when the kick hits, creating that pumping effect you hear in electronic music. For now, just use volume automation—draw a quick dip in volume on the bass track whenever the kick hits.
FL Studio Tutorial: Arrange Your 8-Bar Loop Into a Full Beat
You now have an 8-bar loop that sounds great. But loops aren’t songs. Arrangement turns your loop into a complete musical experience.
The Standard Song Structure Template

Most beats follow this structure:
- Intro: 8 bars (drums only, or stripped back)
- Verse: 16 bars (full beat minus main melody)
- Chorus: 8 bars (full beat, everything hitting)
- Verse: 16 bars (repeat)
- Chorus: 8 bars (repeat)
- Outro: 8 bars (strip elements back to end)
Copy-Pasting with Purpose
In the Playlist window (F5), you’ll see your patterns. Click and drag to arrange them:
- Pattern 1 (drums only) – 8 bars
- Pattern 2 (drums + bass) – 8 bars
- Pattern 3 (full beat) – 16 bars
- Repeat Pattern 2 – 8 bars
- Pattern 3 – 8 bars
- Pattern 1 – 8 bars
This creates dynamic movement. The beat builds, peaks, breathes, and ends.
For a deeper understanding of arrangement principles, this comprehensive guide to electronic music arrangement explains how professionals structure their tracks for maximum impact.
Building Energy with Automation (Basic)
Right-click any knob in FL Studio and select “Create automation clip.” Now draw a line in the Playlist that goes from low to high over 16 bars. Automate a filter cutoff or reverb mix to build tension toward the chorus.
FL Studio Tutorial: Quick Mixing for Clarity
Mixing is just making sure everything can be heard clearly. You don’t need to master this yet—you just need basic clarity.
Leveling: The Most Important Mixing Skill
Open the Mixer (F9). Each channel in your Step Sequencer is assigned to a mixer track. Set fader levels so that:
- Kick: -6dB (loudest)
- Snare: -8dB
- Bass: -10dB
- Melody: -12dB
- Hi-Hats: -18dB
The master fader should never go into the red. If it does, turn everything down.
Basic EQ: Carving Space for Each Element
EQ (equalization) removes frequency conflicts. In the mixer, click on a track slot and load Fruity Parametric EQ 2:
- Kick: Cut everything below 40Hz (rumble) and above 10kHz (hiss)
- Bass: Cut below 40Hz, cut above 200Hz (let the kick take the highs)
- Melody: Cut below 200Hz (let bass and kick handle lows)
- Hi-Hats: Cut below 5kHz (remove boxiness)
Using Fruity Limiter for Simple Compression
Load Fruity Limiter on your kick and snare. Use the “Comp” preset. This evens out the volume so every hit punches consistently.
Adding Reverb and Delay for Depth
Load Fruity Reverb 2 on a return track (an empty mixer track). Send your melody and snare to this track by turning up the “Send” knob in the mixer. Add a little—too much reverb makes beats sound distant and amateur.
For those ready to level up their mixing skills, our guide on advanced mixing techniques for trap beats covers everything from compression to spatial effects.
FL Studio Tutorial: Export and Celebrate
You made it. Thirty minutes passed, and you have a finished beat. Now lock it in.
Proper Export Settings for MP3/WAV
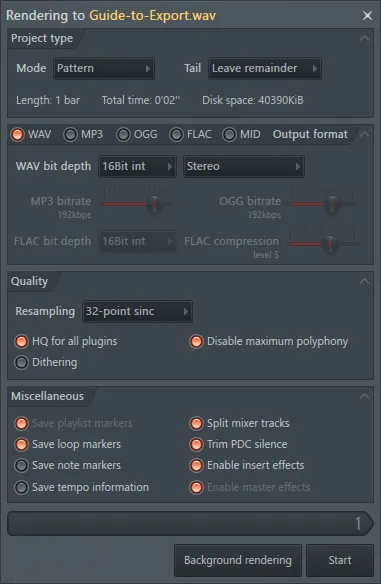
Go to File > Export > MP3 (or WAV). Use these settings:
- Format: WAV (for highest quality) or MP3 (320kbps for sharing)
- Resolution: 24-bit (WAV) or 320kbps (MP3)
- HQ for all plugins: Checked
- Dithering: Unchecked (for now)
Name your file and save it somewhere you’ll find it.
Saving Your Project for Future Edits
Go to File > Save As. Create a folder called “My Beats” and save your project as “My First Beat.flp.” This lets you come back later to tweak, remix, or sample yourself.
What to Do With Your Finished Beat
You now have a finished piece of music. Here are your options:
- Send it to friends for feedback
- Upload to SoundCloud or YouTube
- Save it for when you find an artist to collaborate with
- Start the next one
The most important thing: you finished. Most people never get here. You did.
For more motivation and practical advice on completing projects, check out these secrets to actually finishing your music that professional producers use daily.
FL Studio Tutorial: Advanced Tips to Get Faster
Now that you’ve finished one beat, let’s talk about doing it faster next time.

FL Studio Tutorial: Keyboard Shortcuts That Save Hours
- F5: Playlist
- F6: Step Sequencer
- F7: Piano Roll
- F9: Mixer
- Ctrl+L: Open sample in its own channel
- Alt+V: Open velocity editor
- Ctrl+B: Quick brush tool (draw notes fast)
Learn these five shortcuts, and you’ll cut your production time in half.
FL Studio Tutorial: Creating Your Own Templates
Remember the Minimal template from Step 1? Now create your own. Load your favorite drum sounds, your go-to synth, and your preferred effects on return tracks. Save it as File > Save As > Template. Now every new project starts with your personal setup.
FL Studio Tutorial: Using Pattern Clips vs. Audio Clips
Pattern clips (green in the Playlist) are editable—you can change notes anytime. Audio clips (blue) are bounced-down sound files. Once you’re happy with a pattern, right-click and select “Bounce to audio clip.” This saves CPU and forces you to commit to decisions.
For even more speed, explore workflow hacks for faster production that address common productivity challenges in the studio.
FL Studio Tutorial: Common Mistakes
Learn from others’ mistakes instead of making them yourself.
Overcomplicating the First Project
Your first beat doesn’t need 50 tracks. It doesn’t need complex modulation. It needs a kick, a snare, a hat, a bass, and a melody. That’s it. Everything else is optional.
Watching Tutorials Instead of Doing
Tutorials are valuable, but they’re also a form of procrastination. For every hour of tutorials you watch, spend two hours actually producing. The learning happens when you’re clicking, not when you’re watching.
Ignoring Arrangement Until It’s Too Late
Beginners often spend 90% of their time on a single 8-bar loop, then have no time left for arrangement. Flip the script: spend 15 minutes on the loop, 15 minutes on arrangement. A well-arranged simple beat beats a perfectly crafted 8-bar loop that never becomes a song.
FL Studio Tutorial: Conclusion
This FL Studio tutorial walked you through seven steps: setting up, locking in tempo, building drums, creating melody, adding bass, arranging, and mixing. In 30 minutes, you went from a blank screen to a finished beat.
The most important thing this FL Studio tutorial taught you isn’t technical—it’s psychological. You now know you can finish. You’ve broken the mental barrier that stops most beginners. You have a complete project file, an exported MP3, and the confidence to do it again.
Tomorrow, do it again. Next week, do it five times. By this time next month, you’ll have 20 finished beats. Some will be great. Some will be terrible. All of them will be finished—and that puts you ahead of 90% of people who ever open FL Studio.
Your next step: Download our FL Studio Mixing Preset designed for 30-minute sessions.
FL Studio Tutorial: FAQ
Q1: Is FL Studio good for beginners?
Yes, FL Studio is arguably the best DAW for beginners. Its pattern-based workflow is intuitive, the step sequencer is visual and easy to understand, and there’s massive community support. This FL Studio tutorial proves you can make a complete beat in 30 minutes with zero prior experience.
Q2: Do I need a MIDI keyboard for this FL Studio tutorial?
No. Everything in this FL Studio tutorial can be done with just your mouse and keyboard. The piano roll in FL Studio is actually faster for precise programming than playing live, especially for beginners.
Q3: How long does it take to learn FL Studio?
You can learn the basics in a single session—this FL Studio tutorial is proof. Mastery takes years, but you can make listenable music within hours of opening the software. The learning curve is gentle compared to other DAWs.
Q4: Can I make professional beats with only stock plugins?
Absolutely. Many professional producers use FL Studio stock plugins exclusively. The tools included with FL Studio—Harmless, Sytrus, FPC, Gross Beat—have been used on countless hit records. Don’t let anyone tell you otherwise.
Q5: What’s the best BPM for hip-hop beats?
Traditional hip-hop sits between 85-100 BPM. Modern trap and drill are often produced at 140-160 BPM but feel half-time (so 140 BPM feels like 70 BPM to the listener). Start at 140 BPM and adjust from there.
Q6: Why does my FL Studio beat sound quiet?
Two reasons: you haven’t leveled your tracks properly, or your master limiter isn’t set correctly. Check that your kick is around -6dB, your snare around -8dB, and your master isn’t clipping. In future sessions, learn about limiting and compression for competitive loudness.
Q7: How do I add effects in FL Studio?
Click on a mixer track, click an empty slot, and select an effect from the list. Fruity Reverb 2, Fruity Delay 3, and Fruity Parametric EQ 2 are your best starting points. Use sends for reverb and delay to maintain control.
Q8: What’s the most important thing in this FL Studio tutorial for beginners?
The 30-minute constraint. By forcing yourself to finish in 30 minutes, you bypass perfectionism and actually complete something. Completion is more important than perfection for beginners. You can always make better beats later—but you can’t make anything if you never finish.