
You just finished a beat that feels special. The melody hits. The 808 knocks. The arrangement flows. You export the track, play it in your car, and… something’s wrong. It sounds thin. Muddy. Amateur. Nothing like the professional tracks you compare it to.
I’ve been there. Every producer has.
The frustrating part? You can’t identify what’s wrong. You boost some frequencies, add more compression, turn things up. Somehow, it gets worse. The gap between your creative vision and your technical execution feels insurmountable.
Here’s the truth that changed everything for me: learning how to mix beats isn’t about expensive gear, fancy plugins, or engineering degrees. It’s about a repeatable system. A step-by-step process that transforms raw tracks into polished productions every single time.
This guide delivers exactly that. Twelve proven steps to professional-sounding mixes using only stock plugins and free tools. No thousand-dollar hardware. No confusing engineering jargon. Just practical techniques that work.
How to Mix Beats: Understanding the Fundamentals Before You Start
What Beat Mixing Actually Means (And What It Doesn’t)
Mixing is often misunderstood. It’s not about making things louder. It’s not about fixing a bad recording or arrangement. And it’s definitely not something you do at the end as an afterthought.
Mixing is the art of balance. You take all the individual elements in your beat and sculpt them into a cohesive whole. You decide what the listener hears, when they hear it, and how it feels. Every decision you make during the mixing process shapes the emotional impact of your track.
Think of your raw beat as ingredients on a kitchen counter. Flour, eggs, sugar, butter. Each element has potential, but separately, they’re not a cake. Mixing is the process of combining them in the right proportions, at the right time, with the right technique to create something greater than the sum of its parts.
Why Expensive Gear Won’t Fix Bad Mixing Habits
The gear trap is seductive. You convince yourself that if you just had better monitors, a warmer compressor, or that expensive analog emulation plugin, your mixes would finally sound professional. This belief keeps you spending instead of learning.
Here’s the reality: Andrew Scheps, a Grammy-winning engineer who’s mixed for Adele, Jay-Z, and the Red Hot Chili Peppers, mixes entirely with stock Logic plugins. He uses no third-party plugins and no outboard gear. His mixes sound incredible because his skills are incredible, not because his tools are special.
Learning how to mix beats effectively means focusing on technique, not tools. Stock plugins from any modern DAW are more powerful than the gear that produced classic albums fifty years ago. The limitation is never your plugin folder. It’s your knowledge and practice.
The Critical Difference Between Mixing and Mastering
Beginners often confuse these two processes. They think mastering will fix mixing problems. This is like believing a professional photo framer can fix a blurry photograph. The frame matters, but it can’t compensate for what’s inside.
Mixing is the creative process of balancing and shaping individual tracks. You’re working with every element: drums, bass, melody, vocals. You’re making decisions about level, tone, space, and dynamics for each part.
Mastering is the final polish applied to the complete stereo mix. It’s about subtle overall enhancement, ensuring translation across systems, and preparing for distribution. Mastering can make a good mix great, but it cannot make a bad mix good.
Get your mix right first. Then worry about mastering.
Setting Up Your Session for Mixing Success
Before you touch a single fader, your session needs structure. A chaotic session leads to chaotic mixing decisions. An organized session lets you focus on what matters.
Create separate tracks for every element. Kick on its own track. Snare on its own. Hi-hats grouped but individually accessible. 808 or bass isolated. Each melody element on its own track. This seems obvious, but many producers cram multiple sounds onto one track, destroying their ability to mix effectively.
Name everything. No “Audio 1” or “Synth 2.” Specific names like “Kick 808,” “Main Melody,” “Open Hats.” You’ll thank yourself when you’re three hours into a mix and need to find something quickly.
Step 1: How to Mix Beats With Proper Gain Staging
How to Mix Beats: The -18dBFS Rule
Gain staging sounds technical, but it’s simple: you’re managing levels throughout your signal chain so each stage operates optimally. Think of it as traffic control. If cars pile up at one intersection, everything jams. If levels are too hot at any point, your mix distorts and loses clarity.
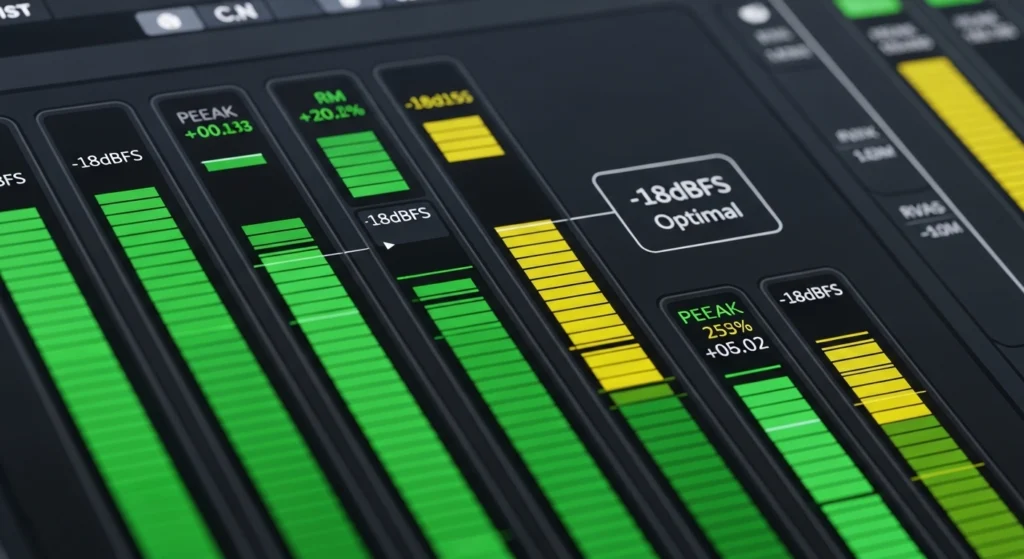
The standard target in digital audio is -18dBFS (decibels relative to full scale). This means your individual tracks should peak around -18 on your meters. This leaves headroom for summing and prevents the digital distortion that occurs when signals approach 0dB.
Check every track in your beat. Adjust the clip gain or channel fader so the loudest peaks hit around -18. This simple step transforms your mix before you’ve done anything else.
Checking Every Track Before You Start
Go through your session systematically. Solo each track and watch its meter during the loudest section. Adjust until peaks consistently land near -18. This takes ten minutes and saves hours of later frustration.
Pay special attention to your 808 or bass tracks. These often accumulate gain through saturation or compression during sound design. Reset them to clean levels before mixing begins.
Common Gain Staging Mistakes That Ruin Mixes
The most common mistake is letting tracks accumulate gain. You add a compressor that makes things louder, then an EQ that boosts, then a saturator that adds more. By the time signals hit your mix bus, they’re slamming against 0dB with no headroom left.
Another mistake is mixing with the master fader cranked. Your master fader should stay at unity (0dB). If you need more volume, you need better mixing, not a louder output.
According to professional gain staging standards from Sound on Sound, maintaining proper levels throughout the chain is the foundation of every professional mix.
Step 2: How to Mix Beats With Effective Organization
How to Mix Beats: Color Coding
Visual organization primes your brain for mixing decisions. When everything looks chaotic, your mind stays chaotic. When everything looks clean and intentional, your mind follows.
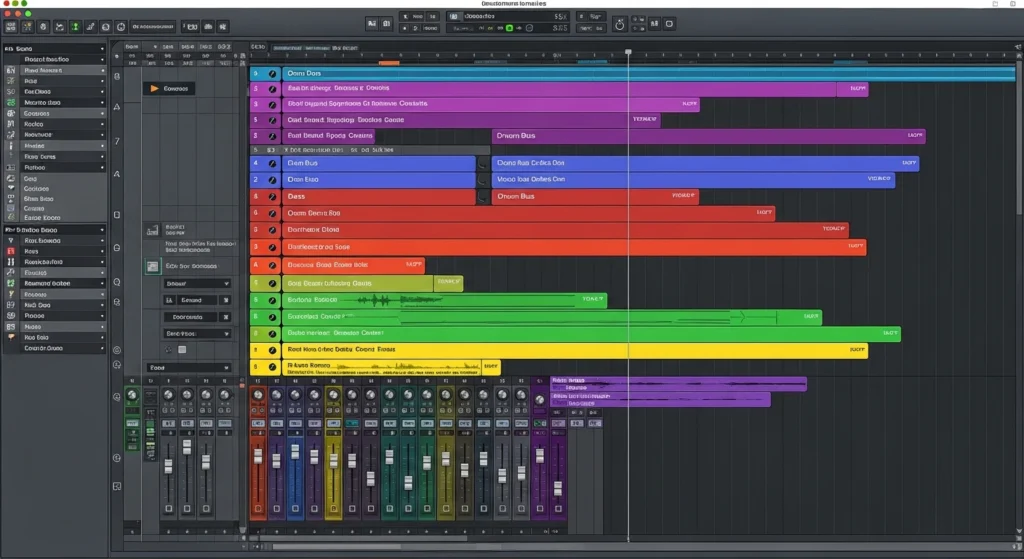
Assign colors by category. Drums in red or orange. Bass in blue. Melody in green. Vocals in purple. This creates instant visual recognition. You can look at your mixer and immediately understand the structure of your session.
How to Mix Beats: Bus Routing Strategies
Buses (or groups) let you control multiple tracks simultaneously. Route all your drums to a drum bus. Route all your melodic elements to a melody bus. Route your 808 to its own bus or include it with drums depending on your genre.
Why? Because you’ll want to process these groups together. A little compression on the drum bus glues your drums into a cohesive unit. EQ on the melody bus ensures all your melodic elements share frequency space harmoniously.
How to Mix Beats: Mix Templates
Once you’ve organized a session perfectly, save it as a template. Every new beat starts with this structure already in place. No more setting up routing from scratch. No more forgetting to create essential buses.
Your template should include: all basic tracks named and colored, all buses created and routed, your favorite utility plugins on each bus (EQ, compression, etc. set flat), and your mix bus with basic metering.
This single investment in organizing your production workflow pays dividends on every future project.
Step 3: How to Mix Beats Using Reference Tracks
Choosing the Right Reference for Your Genre
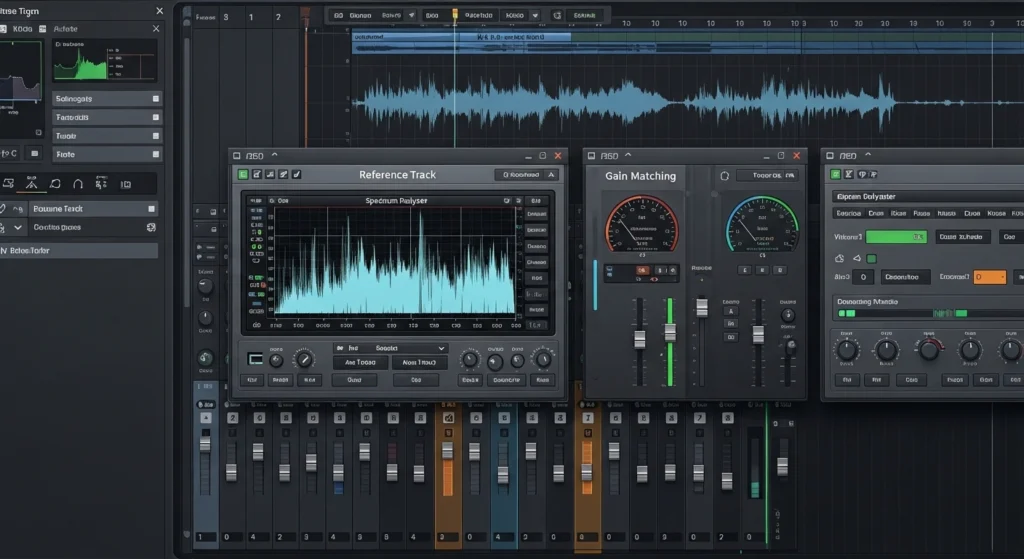
Reference tracks are commercial releases in your genre that sound the way you want your mix to sound. They’re your destination. Without them, you’re driving without a map.
Choose three to five tracks that represent your target. They should be in a similar tempo, similar key, and similar instrumentation to your beat. This ensures apples-to-apples comparison.
Load these tracks into your session on separate tracks. Make sure they’re gain-matched to your mix so volume doesn’t fool your ears.
How to Mix Beats: A/B Comparison
The most effective technique is rapid A/B switching. Listen to a section of your mix, then immediately switch to the reference. What’s different? Is your bass too loud? Are your highs too harsh? Is your stereo width lacking?
Use a plugin like Reference or simply mute/unmute your reference track. Listen specifically for frequency balance, dynamic range, stereo width, and perceived loudness.
How to Mix Beats: Free Reference Tools
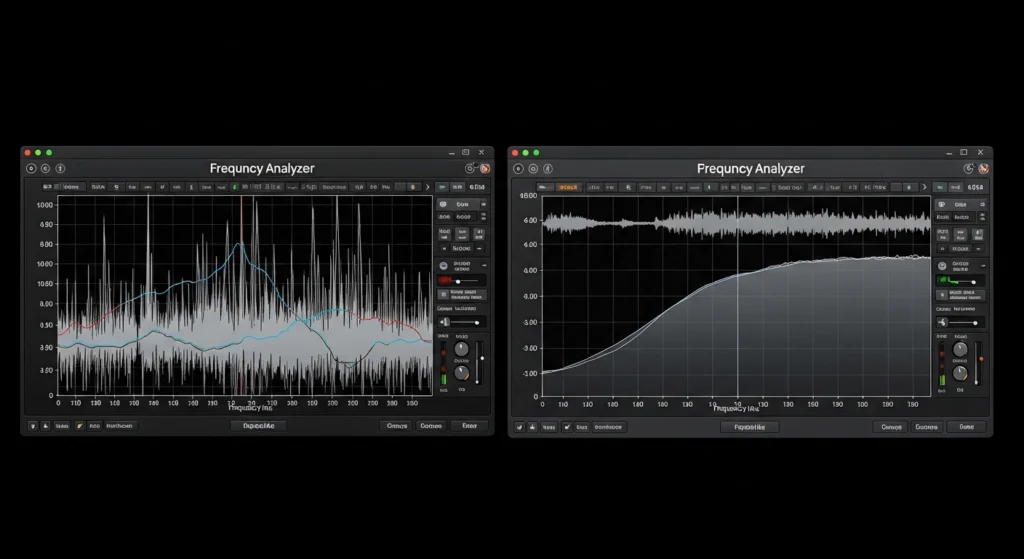
You don’t need expensive plugins for effective referencing. Your DAW’s stock utility plugins can match levels. Free spectrum analyzers like Voxengo SPAN show you frequency distribution. Your ears, trained through practice, are the most important tool.
Step 4: How to Mix Beats With Subtractive EQ First
How to Mix Beats: Frequencies
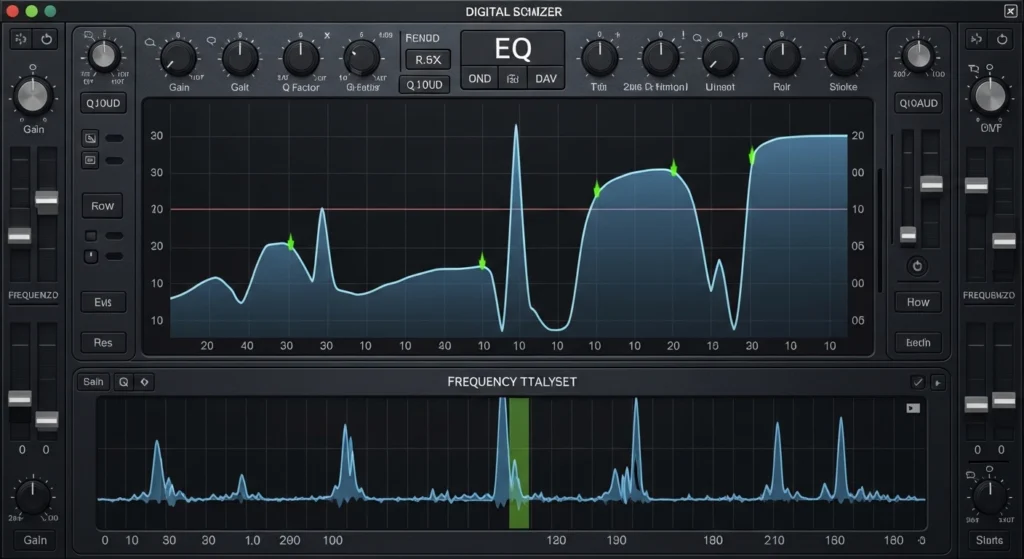
The biggest mistake beginners make with EQ is boosting. They hear something missing and immediately reach for a boost. This adds more sound to an already crowded frequency spectrum, creating more problems.
Professional mixing starts with subtraction. Before you boost anything, remove what doesn’t belong. Use narrow cuts (high Q) to identify and reduce resonant frequencies. Sweep through the spectrum while boosting heavily to find ugly frequencies, then cut them.
Common problems: boxy mud around 200-400Hz, harshness around 2-4kHz, sibilance around 5-8kHz. Each track has its own issues. Listen and cut.
How to Mix Beats: The High-Pass Filter
High-pass filters (low-cut filters) are your best friends. They remove low-frequency content from tracks that don’t need it. Your hi-hats don’t need 100Hz information. Your melodies don’t need 80Hz rumble. Your vocals don’t need 120Hz body if they’re not bass vocals.
Apply high-pass filters to every track except your kick and bass. Start around 100Hz and adjust upward until you hear the track thin unacceptably, then back off slightly. This instantly cleans your low end and reduces frequency masking.
How to Mix Beats: Frequency Carving
Once you’ve removed problems, you can carve space for each element. This means ensuring your kick and bass occupy complementary frequency ranges. Your kick might dominate 50-80Hz while your bass sits from 80-150Hz. Your snare might cut through around 200Hz and 2kHz.
According to EQ guides from iZotope, thinking of the frequency spectrum as real estate helps. Every element needs its own space. When two elements compete for the same frequencies, neither wins.
Step 5: How to Mix Beats With Dynamic Control
How to Mix Beats: Compression Basics for Beatmakers
Compression reduces the dynamic range of a signal, making quiet parts louder and loud parts quieter. This creates consistency and punch. For beatmakers, compression is essential for drums and 808s.
The basic controls: threshold (when compression starts), ratio (how much compression), attack (how fast compression engages), release (how fast compression releases), and gain (make-up gain to restore level).
Start with a 4:1 ratio, threshold set so you get 3-6dB of gain reduction, medium attack (10-30ms), and medium release (50-100ms). Adjust from there based on what you hear.
How to Mix Beats: Attacking Drums vs Taming Dynamics
Different elements need different compression approaches. Drums benefit from faster attack times to catch transients and create punch. Bass benefits from slower attack times to let the initial hit through before compression engages on the sustain.
Listen to what each track needs. Some tracks are already well-controlled and need minimal compression. Others are wild and need heavier handling. Trust your ears over rules.
How to Mix Beats: Parallel Compression
Parallel compression (New York compression) blends a heavily compressed version of a signal with the dry original. This gives you the body and sustain of compression without losing the transient impact of the original.
Create a return track with aggressive compression (high ratio, low threshold, fast attack). Send your drums to this track and blend to taste. The effect is subtle but powerful, adding weight without squashing life.
If you want to dive deeper into dynamic processing, mastering sidechain compression techniques will take your mixes to another level.
Step 6: How to Mix Beats Through Balanced Levels
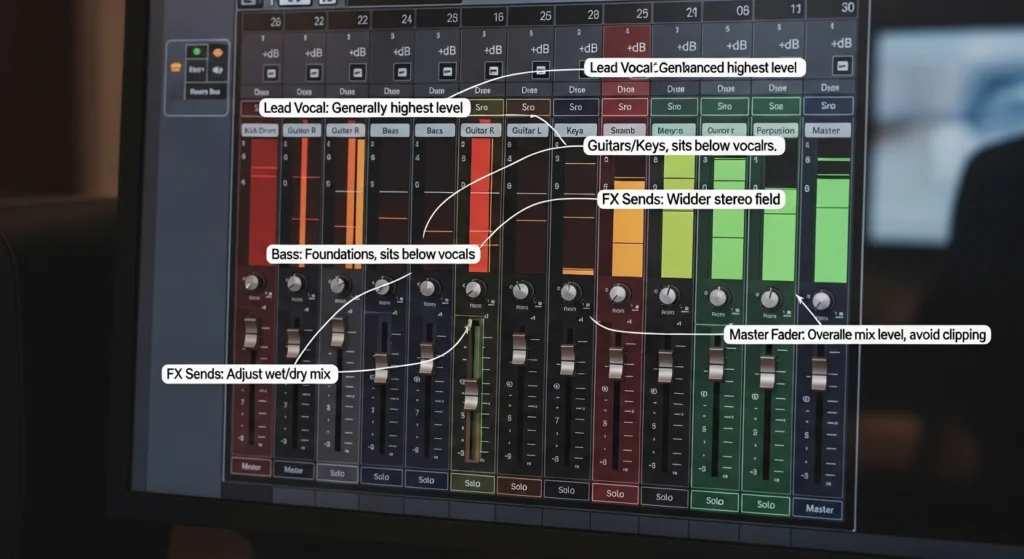
How to Mix Beats: The Fader Trick
Here’s a technique that instantly improves any mix: start with all faders at zero. Then slowly bring up elements in order of importance. Kick first. Snare second. 808 third. Then gradually add other elements.
This forces you to build your mix from the foundation up. You establish the core rhythm section at proper levels before adding melodic elements that might distract you. By the time you add melodies, the foundation is solid and you know exactly how much space remains.
Building Your Mix From the Bottom Up
Low end is the foundation of modern beat music. If your low end isn’t right, nothing else matters. Spend significant time getting the relationship between your kick and 808 perfect.
Listen on systems with good low-end reproduction. Adjust levels until the kick and bass lock together rhythmically and tonally. The kick should punch through while the 808 provides weight. When they’re right, the rest of your mix builds on solid ground.
How to Mix Beats: Your Ears vs Your Meters
Meters give you objective data. Your ears give you subjective experience. Both are essential. Use meters to confirm what you hear and catch what you miss. But never make decisions based solely on meters.
If your mix sounds right but looks wrong on meters, trust your ears. If your mix looks right on meters but sounds wrong, trust your ears. The listener experiences sound, not numbers.
Step 7: How to Mix Beats With Creative Panning
How to Mix Beats: Stereo Width
Panning creates space by placing elements across the stereo field. Center: kick, bass, snare, lead vocal. Off-center: hi-hats, percussion, background elements. Wide: pads, effects, doubled parts.
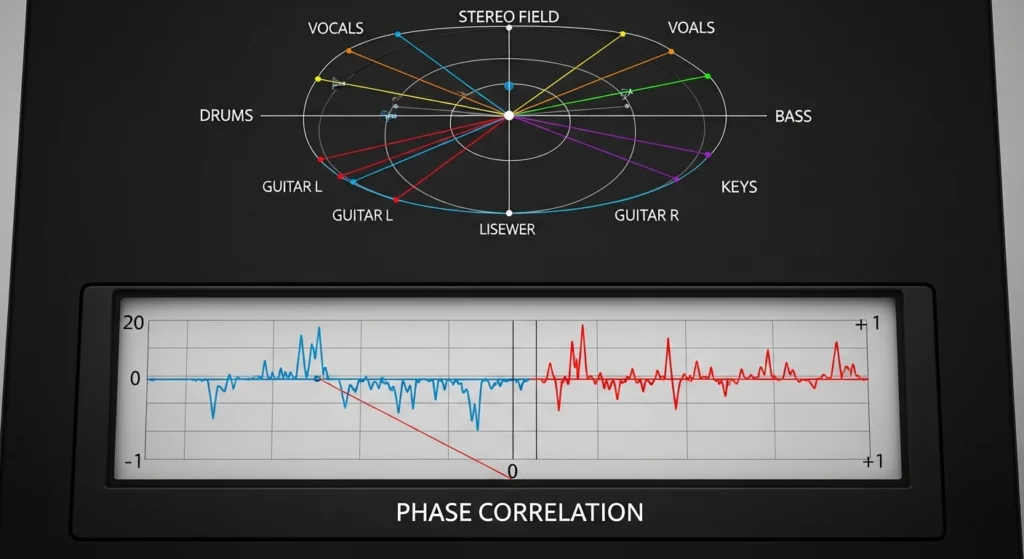
But width without phase problems is crucial. When you create width through stereo widening plugins or extreme panning, always check mono compatibility. Sum your mix to mono regularly. If elements disappear or change character drastically, your width techniques are causing phase cancellation.
Creating Space Through Placement
Think of your stereo field as a stage. The audience sits center. Important elements belong center stage. Supporting elements spread left and right. This creates a realistic, immersive experience.
Pan hi-hats slightly right. Pan percussion slightly left. Layer multiple melody parts and pan them opposite directions for width. Every element gets its own position, reducing masking and creating clarity.
Mono Compatibility Checks That Save Mixes
Many listeners hear music in mono. Phones, Bluetooth speakers, club systems, and many playback environments collapse stereo to mono. If your mix falls apart in mono, it falls apart for a huge portion of your audience.
Throughout your mix, periodically hit the mono button on your master bus. Listen for elements that disappear or shift dramatically. Adjust your panning and width techniques until the mix translates.
Step 8: How to Mix Beats Using Spatial Effects
How to Mix Beats: Reverb Placement
Reverb creates a sense of space. A little reverb makes elements feel like they exist in a real room. Too much reverb creates mud and washes out your mix.
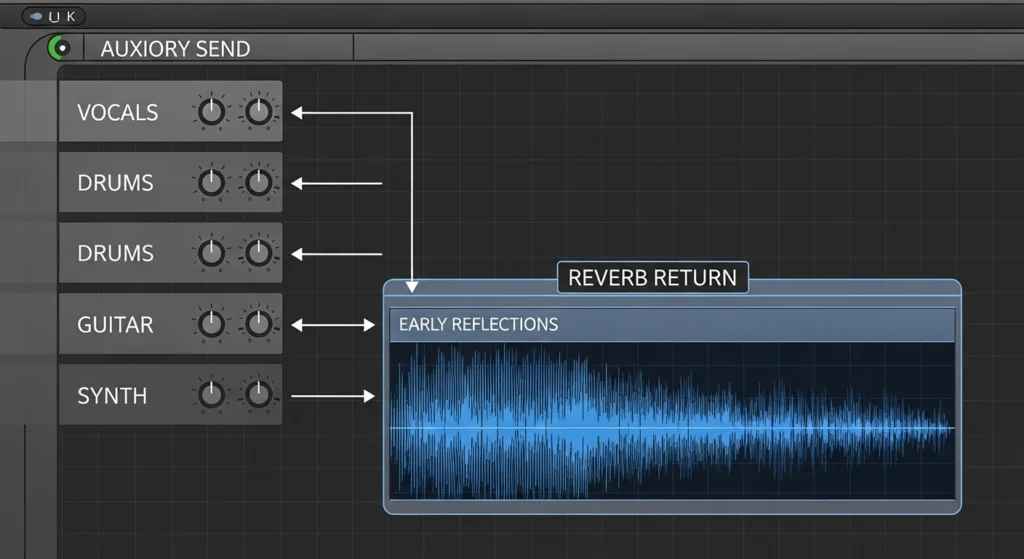
Use reverb sends rather than inserts. Send multiple tracks to the same reverb for cohesion. EQ your reverb returns to remove low-end mud and high-end harshness. High-pass around 300-500Hz. Low-pass around 8-10kHz.
Different reverb types create different spaces. Plates for vocals and snares. Rooms for drums. Halls for pads and atmospheric elements. Chambers for vintage character.
How to Mix Beats: Delay Techniques
Delay creates rhythm and space. Simple quarter-note delays add thickness. Ping-pong delays create movement across the stereo field. Dotted-eighth delays create the classic rhythmic effect heard in countless records.
Use delays sparingly. A single word or hit with delay stands out. Everything with delay becomes noise. Automate delay throws on specific moments for impact.
How to Mix Beats: Send Effects vs Insert Effects Explaine
Insert effects process the entire signal. Compression, EQ, saturation typically work as inserts. Send effects blend processed signal with dry signal. Reverb, delay, parallel compression work as sends.
The advantage of sends is control. You can send multiple tracks to the same effect for cohesion. You can EQ the effect return without affecting the dry signal. You can automate send levels independently.
Step 9: How to Mix Beats With Saturation and Harmonic Excitement
How to Mix Beats: Saturation Plugins
Saturation adds harmonic content, creating warmth, presence, and character. Analog gear naturally saturates, adding pleasing harmonics. Digital saturation emulates this effect.
Your DAW likely includes saturation or distortion plugins. Free options abound. Use subtle saturation on drums for punch, on bass for harmonic presence on small speakers, on melodic elements for character.
The key is subtlety. A little saturation sounds like expensive gear. Too much saturation sounds like distortion.
How to Mix Beats: Tape and Tube Emulation
Tape emulation adds compression, saturation, and frequency shaping. It smooths transients and adds high-frequency roll-off for vintage character. Tube emulation adds even-order harmonics for warmth.
Apply tape emulation lightly to your mix bus for glue. Apply tube emulation to individual tracks for character. Experiment with different emulations to find flavors you love.
Exciting High End Without Harshness
Exciting high frequencies without harshness is an art. Use shelving EQs for gentle high-frequency boosts. Use saturators that add high harmonics naturally. Use exciters designed specifically for high-frequency enhancement.
Listen on multiple systems. If your high end sounds harsh anywhere, back off. A mix that’s slightly dull on your main monitors will sound perfect on bright consumer systems.
For a comprehensive list of tools, check out the best analog warmth plugins available for in-the-box producers.
Step 10: How to Mix Beats Through Bus Processing
How to Mix Beats: Drum Bus Compression
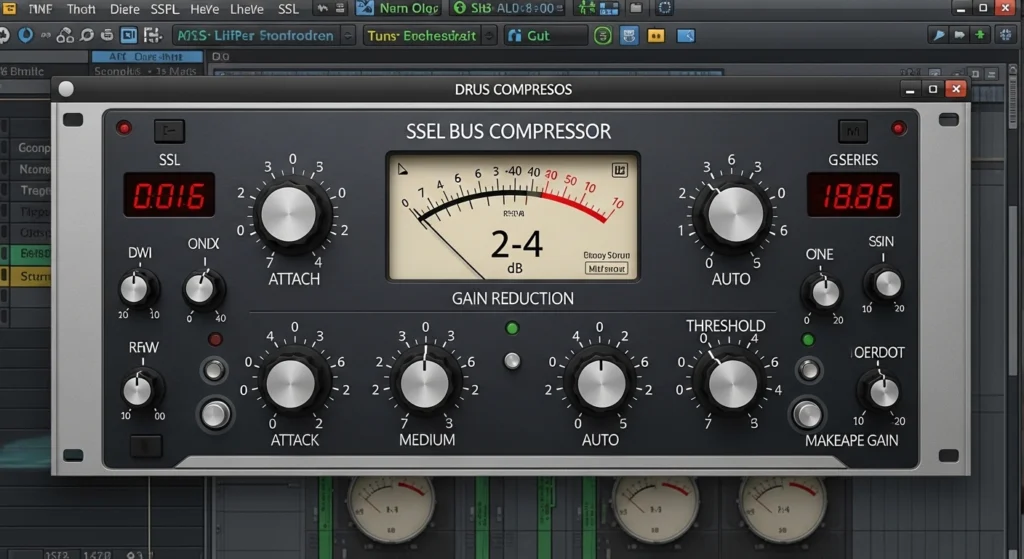
Your drum bus is where individual drums become a kit. A compressor on the drum bus with gentle settings (2:1 ratio, 2-4dB gain reduction, medium attack, auto release) glues everything together.
The compression makes the drums breathe together. When the kick hits, the whole bus ducks slightly. When the snare hits, everything responds. This creates the feeling of a unified performance rather than separate samples.
How to Mix Beats: Mix Bus Techniques
The mix bus (master bus) is your final processing stage before mastering. Light processing here adds final polish. Common techniques: very light compression (1.5:1, 1-2dB gain reduction), subtle EQ shaping, and gentle saturation.
The key is restraint. Heavy processing on the mix bus destroys flexibility. Save aggressive processing for individual tracks or mastering. The mix bus should enhance, not transform.
How to Mix Beats: Processing on Groups
Parallel processing isn’t just for drums. Create parallel compression for your melody bus. Blend in a heavily saturated version of your bass. Add a parallel reverb return for your whole mix.
Experiment with parallel techniques on different groups. Each adds unique character while preserving the integrity of the original signal.
Step 11: How to Mix Beats With Automation
Dynamic Changes That Bring Mixes to Life
A static mix is boring. Dynamic changes keep listeners engaged. Volume automation creates build and release. Filter automation creates tension. Effect automation creates movement.
Automate the volume of your intro down so the drop hits harder. Automate a filter sweep before a chorus. Automate reverb send on a snare before a breakdown. These small movements create professional interest.
How to Mix Beats: Automating Effects
Transitions between sections need attention. An abrupt change from verse to chorus feels amateur. Gradual or punctuated transitions feel professional.
Automate a high-pass filter rising before a drop. Automate reverb increasing before a breakdown. Automate delay throws on the last word before a chorus. These techniques guide the listener through your arrangement.
How to Mix Beats: Volume Automation
If your beat includes vocals, volume automation is essential. Vocalists naturally vary in level. Syllables get lost. Phrases jump out. Volume automation smooths these inconsistencies.
Go through your vocal track word by word. Raise quiet phrases. Lower loud phrases. This detailed work separates professional vocals from amateur efforts.
For more on dynamic production, explore finishing tracks with automation as part of your completion strategy.
Step 12: How to Mix Beats With Critical Listening Tests
How to Mix Beats: The Car Test Protocol
The car test is the ultimate mix translation check. Cars have imperfect acoustics, road noise, and small speakers. If your mix sounds good in the car, it sounds good anywhere.
Burn your mix to a USB or stream from your phone. Listen at normal volume. Take notes: What’s missing? What’s overpowering? What sounds harsh? Return to your studio with specific targets.
Multiple Speaker System Checks
Don’t stop at the car. Listen on laptop speakers. Listen on Bluetooth speakers. Listen on headphones. Listen on earbuds. Each system reveals different aspects of your mix.
Laptop speakers reveal mid-range problems. Bluetooth speakers reveal low-end translation issues. Headphones reveal stereo imaging and detail. Earbuds reveal harshness and sibilance.
Reference Playback Across Devices
Compare your mix to reference tracks on each system. How does your low end compare on Bluetooth speakers? How does your vocal presence compare on laptop speakers? How does your stereo width compare on headphones?
This systematic testing builds a complete picture of how your mix translates. According to research on listening environment accuracy from the Audio Engineering Society, translation testing is essential for professional results.

How to Mix Beats: Common Problems and Quick Fixes
Fixing Muddy Low End
Muddy low end usually means too many elements competing below 150Hz. High-pass everything except kick and bass. Check your kick and bass frequency relationship. Cut around 200-400Hz on muddy tracks.
Taming Harsh High Frequencies
Harsh highs come from over-processed cymbals, harsh synths, or excessive high-frequency boosting. Use a de-esser on problematic tracks. Apply gentle high-frequency cuts with a shelf EQ. Check your mix on bright systems.
Solving Phase Cancellation Issues
Phase cancellation causes elements to disappear in mono. Check correlation meters. If your correlation drops below zero, you have phase problems. Flip polarity on one track of a stereo pair. Use mono-compatible widening techniques.
Addressing Weak Punch and Impact
Weak punch often comes from insufficient transient preservation. Check your compression attack times. Faster attacks preserve transients. Check your kick and snare levels. These should be your loudest elements after balancing.
How to Mix Beats: Free Tools That Actually Work
Best Free EQ Plugins
Your DAW’s stock EQ is probably excellent. If you want alternatives, TDR Nova is a dynamic EQ that’s completely free. Tokyo Dawn Labs makes professional-grade tools with zero cost. Voxengo Marvel GEQ offers vintage-style graphic EQ.
Best Free Compression Plugins
TDR Kotelnikov is a professional mastering compressor available free. Molot from Tokyo Dawn Labs offers character compression. Rough Rider from Audio Damage is a classic free compressor still used by professionals.
Best Free Metering and Analysis Tools
Voxengo SPAN is the industry standard free spectrum analyzer. Youlean Loudness Meter shows LUFS levels essential for streaming compliance. MAnalyzer from Melda Production offers comprehensive frequency analysis.
Best Free Reverb and Delay Plugins
OrilRiver is a stunning free reverb that rivals paid options. Valhalla Supermassive offers massive, experimental reverbs and delays free. Space Craft from Cargo Cult provides unique spatial effects.
For more recommendations, browse our curated list of best free VST plugins for professional production.
Conclusion
Learning how to mix beats is a journey, not a destination. These twelve steps provide a repeatable system, but mastery comes from practice. Mix one beat using this workflow. Then mix another. Then another. Each mix teaches you something new.
Remember that every professional mix engineer started exactly where you are. They made muddy mixes. They fought with harsh frequencies. They struggled with translation. The difference is they kept going. They developed systems. They learned from every mistake.
You have everything you need. Stock plugins. Free tools. Your ears. This guide. The only missing ingredient is consistent practice.
Export your next mix. Test it everywhere. Take notes. Implement fixes. Repeat. Six months from now, you’ll listen to your current mixes and hear how far you’ve come. That progress is the reward.
Now close this article, open your DAW, and start mixing.
Frequently Asked Questions
How do I mix beats for beginners?
Start with gain staging and organization. Set all track levels around -18dBFS. Name and color everything. Route tracks to buses. Then work through EQ, compression, and balancing in order. Use reference tracks constantly. Test your mix on multiple systems. The beginner’s path is systematic practice, not magic tricks.
What is the best way to mix beats at home?
The best way is to create a repeatable workflow like the twelve steps outlined above. Treat your room as much as your budget allows. Use reference tracks religiously. Take breaks to preserve your ears. Learn your monitors or headphones intimately. And be patient with yourself. Home mixing improves with every project.
How long should it take to mix a beat?
A simple beat might take one to two hours. A complex arrangement with many elements could take four to six hours. Professional engineers often spend full days on single mixes. Take whatever time your mix needs, but don’t obsess. Sometimes good enough is perfect.
Do I need expensive gear to mix beats professionally?
No. Modern stock plugins are more powerful than the gear used on classic recordings. Many professional engineers use stock plugins exclusively. Focus on technique, practice consistently, and learn your tools deeply. Gear matters far less than skill.
How do I make my 808s hit harder in the mix?
Ensure your kick and 808 are frequency-complementary. Use sidechain compression to duck the 808 slightly on kick hits. Add saturation for harmonic presence on small speakers. Check your mix in mono to ensure phase cancellation isn’t weakening your low end.
Why do my beats sound quiet compared to professional tracks?
Professional tracks are mixed for perceived loudness, not peak level. Your mix likely has more dynamic range. Use compression and limiting appropriately, but don’t sacrifice dynamics for loudness. Streaming platforms normalize volume anyway. Focus on balance and impact first.
What order should I mix my beats in?
Follow the order in this guide: gain staging, organization, reference, subtractive EQ, dynamics, levels, panning, spatial effects, saturation, bus processing, automation, critical listening. This order builds logically from foundation to polish.
Can I mix beats with just headphones?
Yes, but choose headphones designed for mixing (neutral frequency response). Learn their sound intimately. Check your mixes on speakers whenever possible. Use reference tracks to calibrate your perception. Many professionals mix entirely on headphones with excellent results. For recommendations, see our guide to choosing studio headphones for mixing.