
Hybrid Studio Setup
Is your music precise but sterile?
The modern Digital Audio Workstation (DAW) offers unparalleled sonic control and efficiency, the true “Digital Power” of modern music. However, many producers find their tracks lack the harmonic richness, saturation, and three-dimensional feel that defined classic records. This is the missing “Analog Warmth.”
Most producers settle for one or the other, or they are intimidated by the complex wiring of a Hybrid Studio Setup. This guide simplifies the process. We break down the Hybrid Studio Setup into 7 essential steps to achieve a perfect blend of old-school tone and new-school speed.
Learn how to get the depth, punch, and glue of analog while retaining the speed, automation, and recall of digital.
The Core Philosophy: Defining Your Hybrid Studio Setup Workflow
A hybrid studio is defined by its routing flexibility. You must decide at what point in the signal chain you want to introduce the character of analog gear.
Tracking Analog, Mixing Digital (The Front-End Approach)
This is the simplest and most common form of a Hybrid Studio Setup. You use analog gear (a great preamp, compressor, or EQ) on the way into your audio interface to capture the signal with “Analog Warmth” immediately. Once recorded, all mixing is done inside the DAW with plugins. This is highly effective but limits the use of your hardware only to the recording stage.
Mixing with Outboard (The External Effects Loop)
This is the true Hybrid Studio Setup workflow. It involves sending a track or bus out of your DAW, through a piece of analog hardware (like a compressor), and back into the DAW on a new track. The hardware acts as an External Effects Loop, allowing you to use your analog gear on any track, at any time, just like a digital plugin. This is the focus of our setup guide.
The Power of Analog Summing Mixer
Summing is taking multiple tracks and combining them into a final Hybrid Studio Setup. An Analog Summing Mixer is a dedicated box that takes the separate outputs of your DAW and mixes them in the analog domain before returning a final stereo signal to the DAW. Many engineers believe this process adds an overall depth and glue that digital summing struggles to replicate.
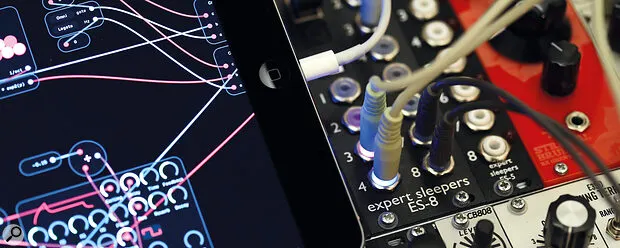
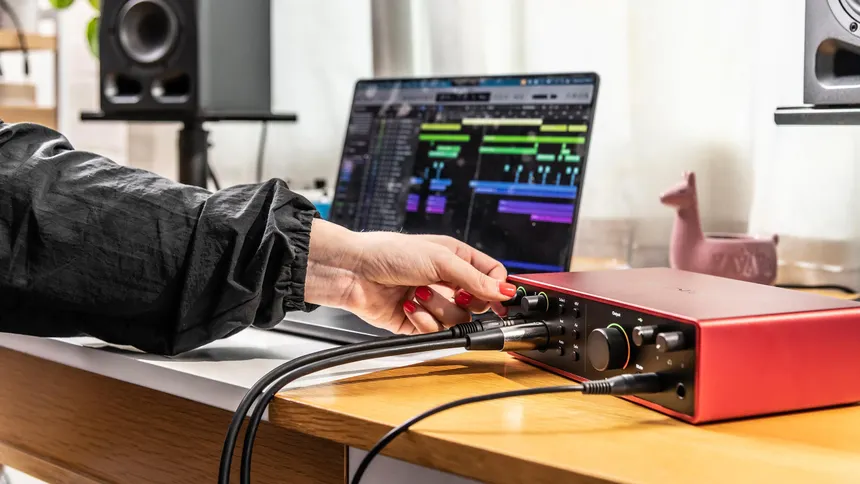
Step 1: The High-Channel Audio Interface (The Digital Bridge)
The heart of any Hybrid Studio Setup is the audio interface. It is the bridge between the “Digital Power” of your computer and your “Analog Warmth” outboard gear.
I/O Requirements for an Effective External Effects Loop
For a true Hybrid Studio Setup workflow, you need a high channel count audio interface. For every stereo piece of analog gear you want to use as an insert, you need two dedicated outputs and two dedicated inputs.
- A minimum viable setup for one stereo compressor:
- 2 Outputs (DAW out to Hardware in)
- 2 Inputs (Hardware out to DAW in)
- For a flexible setup, you should aim for 8 to 16 outputs to handle multiple pieces of gear or for an Analog Summing Mixer. This is the single biggest investment in your hybrid journey.
The Importance of High-Quality Converters
Your interface’s job is constantly converting signal: Analog-to-Digital (AD) when recording and Digital-to-Analog (DA) when sending tracks to your outboard gear. Invest in high-quality converters, as they are the sonic gatekeepers of your entire hybrid workflow.
Step 2: Choosing Your Analog Starter Gear (For That Missing Analog Warmth)
To start a Hybrid Studio Setup, you do not need an entire console. Focus on a single piece of gear that has a dramatic, unmistakable effect.
The Preamplifier: Saturation for Vocals and Drums
If you only buy one piece of analog gear, make it a high-quality preamp. Using a transformer-based or tube preamp during the tracking stage will inject that rich, detailed “Analog Warmth” into your recordings right away. This saturation is almost impossible to fully replicate with plugins.
The Bus Compressor: Adding “Glue” to Your Mix
A stereo bus compressor is the ideal choice for a hybrid studio setup mixing. Used on the main stereo bus, it adds a subtle movement and “glue” that makes the mix feel cohesive and more like a finished record. This is a critical component for achieving that professional sonic polish.
The Equalizer: Broad, Musical Sweetening
Analog EQs, particularly passive tube designs, are known for their broad, musical curves. They are excellent for sweetening a track or a bus with gentle, pleasing frequency boosts that sound transparent and natural, unlike the surgical precision of many digital EQs.
Step 3: Setting Up the External Effects Loop (Outboard Gear as Plugins)
This is the magic that truly defines the hybrid studio setup workflow. It allows you to use your outboard gear as plugins within your DAW.
DAW Routing: Creating an I/O Insert Point
Most modern DAWs have a dedicated I/O or Hardware Insert utility. This feature allows you to select a hardware output pair and input pair on an insert slot of a track or bus, exactly where you would place a digital plugin.
Calibration: Level Matching for Unity Gain
The most common mistake in a hybrid studio setup is not level matching. Before you process any sound, send a tone out of the DAW, through the analog hardware, and back in. Adjust the input and output gain on the hardware until the signal returns at the exact same level (unity gain) it left the DAW. This ensures you are hearing the tone of the gear, not just a level change.
Latency Compensation for Seamless Integration
Because the signal is leaving your computer, traveling through analog circuits, and returning, there will be a slight delay (latency). Your DAW must compensate for this. Most DAWs with an I/O insert feature will automatically calculate and compensate for this delay, allowing the hardware to operate sample-accurate, just like a digital plugin.
Step 4: Integrating a Control Surface (For Tactile Digital Power)
The digital side of the hybrid studio setup focuses on speed and Total Recall. A control surface gives you the tactile experience of a large console without the cost or maintenance.
The Need for Faders and Knobs in a Hybrid Mix
For a fast, intuitive hybrid studio setup workflow, you need faders and knobs. A MIDI control surface allows you to adjust multiple levels simultaneously, automate volume and panning, and control plugins with your hands. This physical interaction is far superior to a mouse for the rapid decision-making required in advanced mixing techniques.
Control Surfaces vs. Analog Summing Mixer (Clarity on Roles)
- Control Surface: Handles the control of the DAW (faders, transport, plugins). It passes no audio. It provides Digital Power tactility.
- Analog Summing Mixer: Handles the audio (summing the tracks). It passes no control data. It provides Analog Warmth. They fulfill completely separate, but complementary, roles.
Step 5: The Master Bus Strategy (The Final Analog Warmth)
The final stereo mixdown is the last chance to inject Analog Warmth and glue everything together in a hybrid studio setup.
Using a Stereo Compressor for Bus Processing
As mentioned in Step 2, a stereo bus compressor on the mix bus is a common trick. By inserting a hardware compressor using the External Effects Loop on your master fader, you can achieve the classic “glue” and subtle harmonic distortion that makes a digital mix sound “finished.”
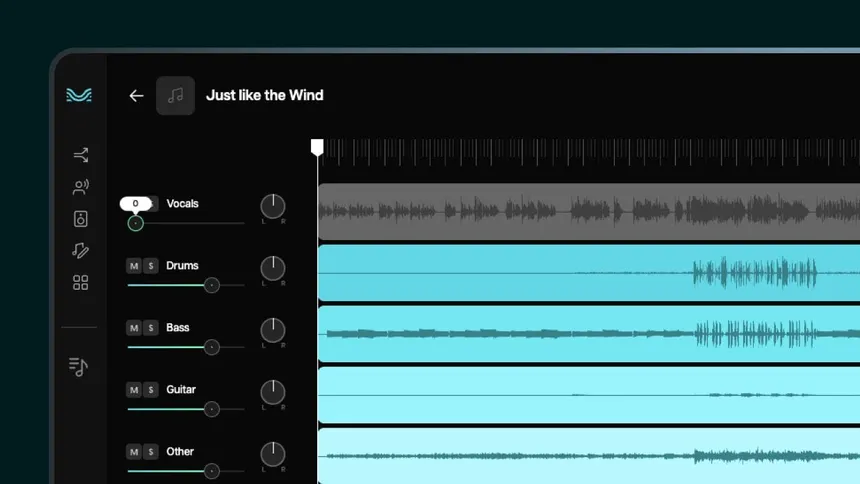
When to Use a Dedicated Analog Summing Mixer
If you have at least 8 quality channels of DA conversion and your budget allows, a dedicated Analog Summing Mixer is an excellent final piece. By sending your drum bus, bass, music, and vocal stems to the summing mixer, the individual signals interact in the analog domain, often yielding a richer soundstage and depth that is difficult to create inside the box. Review of the [best analog summing mixers] can help you decide.
The Art of Re-Amping vs Outboard Gear for Guitar
Re-Amping vs Outboard Gear is a crucial distinction.
- Outboard Gear: Used as an insert for mixing (Step 3).
- Re-Amping: Used for sound design. You send a DI guitar signal out of the interface and through a guitar amplifier or effect pedal, then re-record the result back into the DAW. This is a common creative use of the hybrid setup’s flexible routing.
Step 6: Mastering the Total Recall Challenge (Digital Organization)
The single biggest drawback of a Hybrid Studio Setup is the lack of Total Recall—the ability to instantly save and reopen a session with all settings intact. Digital is perfect for this; analog is not.
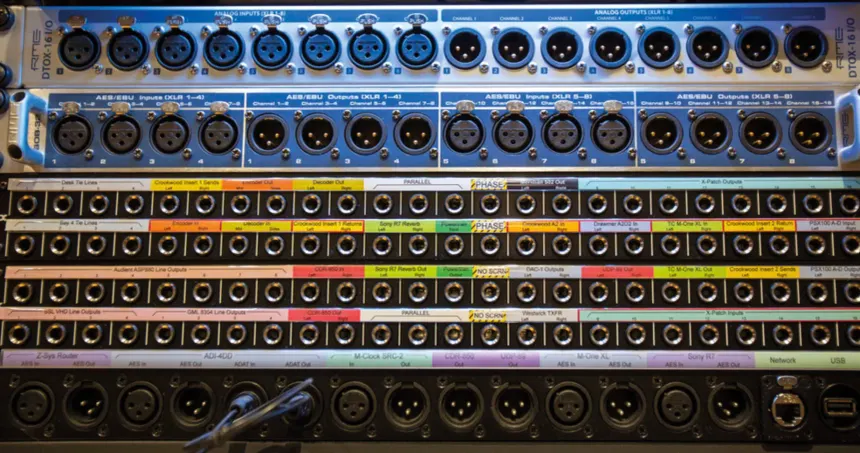
The Importance of a Detailed Patch Bay Chart
If you use a patch bay (highly recommended for a hybrid studio setup), you must document every single connection. Create a simple chart that notes which interface I/O is connected to which analog gear. For example: “Interface Out 5-6 > Compressor In / Compressor Out > Interface In 5-6.” This organization is key to future sessions.
Using Plugin Emulations to Document Analog Settings
Since the analog gear itself will not save the settings in the DAW, you must manually document them. A smart technique is to place a corresponding digital plugin emulation (e.g., an SSL channel strip plugin) on the DAW channel and dial in the settings to match the hardware you used. While not passing the audio, this provides a visual, saved reference for your hardware settings, similar to the organized hybrid studio setup workflow required when using midi kits to elevate your production workflow.
Step 7: Mastering the Monitoring Path (The Crucial Listen)
The monitoring path is the final and most critical step for a successful hybrid studio setup . If you cannot hear the blend of Analog Warmth and Digital Power accurately, the setup is useless.
Monitoring Via the DAW vs. Directly from the Interface
Ensure your monitoring is consistent.
- Tracking: Monitor directly from your interface’s low-latency mixer to hear the analog gear as it is recorded without DAW delay.
- Mixing: Monitor through the DAW’s master bus so you hear the sum of all internal tracks and any hardware inserts used on the mix bus.
The Importance of Room Correction for the hybrid studio setup
The best analog gear in the world cannot fix a poor listening environment. Your room is the final piece of gear. Room correction software can analyze your room’s acoustics and adjust the monitoring output to give you a flatter, more accurate frequency response. This ensures you are truly hearing the subtle Analog Warmth your new gear is providing and a good hybrid studio setup.
Your Two Primary Hybrid Workflows
The complexity of your Hybrid Studio Setup will dictate your primary workflow:
Workflow A: Console-Centric Routing
- The Hub: A large analog mixing console.
- The Flow: All tracks and stems go out of the DAW and into the console. Mixing is done primarily on the console’s faders and EQs, with the final mix bus returned to the DAW for recording.
- Best For: Commercial studios, high budget, maximum hands-on feel.
Workflow B: DAW-Centric Routing (Best for Home Studio)
- The Hub: The DAW (Logic, Pro Tools, etc.).
- The Flow: Analog gear is patched in via the I/O Insert utility (Step 3) to be used as plugins. The mix is automated digitally. Final mix is sent through a stereo bus chain (compressor/EQ) before printing.
- Best For: Home studios, smaller budgets, superior Total Recall and efficiency. This is the fastest way to [make trap beats like the pros] with added analog tone.
Conclusion
A Hybrid Studio Setup is the most versatile solution for modern production, offering an unmatched combination of tone and efficiency.
The blend of “Analog Warmth” and “Digital Power” is achieved through smart routing, not expensive gear alone. By following these 7 essential steps to blend analog warmth with digital power, you can break free from the sterile sound of purely digital production and gain the sonic depth and character of classic records.
Start with a simple, high-quality two-channel piece of outboard gear and implement Step 3 to use it as an External Effects Loop. You will immediately hear and feel the difference.
FAQ Section
1. What is the minimum I/O count for a Hybrid Studio Setup?
The absolute minimum is 4 inputs and 4 outputs (4×4) to handle a single stereo piece of outboard gear used as an insert (2 out, 2 in) while still leaving a stereo pair for monitoring. However, 8×8 or 16×16 is recommended for true flexibility.
2. Is an Analog Summing Mixer worth the cost for a small studio?
For a small studio, it is generally better to invest in one or two high-quality analog preamps or a bus compressor first. The benefits of an Analog Summing Mixer are subtle and only truly realized when you have excellent converters and a finely tuned monitoring environment.
3. What is the difference between an External Effects Loop and re-amping?
An External Effects Loop is for mixing and returns the signal to the same track (insert). Re-amping is for sound design; the original signal is sent out, processed (often through a guitar amp), and then recorded back into the DAW on a brand new, separate track.
4. How do I deal with latency when using outboard gear as plugins?
Most modern DAWs have a built-in feature called “Hardware Insert Delay Compensation” that automatically measures the time difference (latency) when the signal travels through the interface’s converters and out to your analog gear, then adjusts the timeline accordingly.
5. What is “Total Recall” and why is it difficult in a hybrid system?
Total Recall is the ability to instantly save and reload all settings for an entire mix session. It is difficult in a hybrid system because analog gear settings (knob positions) must be manually photographed or written down, unlike digital plugins whose settings are saved with the DAW project.
6. Can I use a small analog mixer as an Analog Summing Mixer?
Yes, a small analog mixer can be used as an Analog Summing Mixer by routing your DAW’s sub-mixes (stems) to the mixer’s channels and recording the final stereo output back into your interface. However, the quality of the mixer’s internal bus is critical.
7. Which should I buy first: a good preamp or a good compressor for a hybrid setup?
If you record live instruments or vocals, a good preamp is the best first purchase to inject Analog Warmth from the start. If you only work with VSTs and samples, a stereo bus compressor is a better first choice for that “Analog Warmth” and “glue” on the master bus.
8. Does a hybrid setup actually deliver true Analog Warmth?
Yes, it does. Analog Warmth is the result of subtle harmonic distortion, non-linear frequency response, and transformer saturation in analog circuits. By routing digital audio through real analog gear, you capture these sonic qualities, which significantly elevate the sound beyond the purely digital domain.